
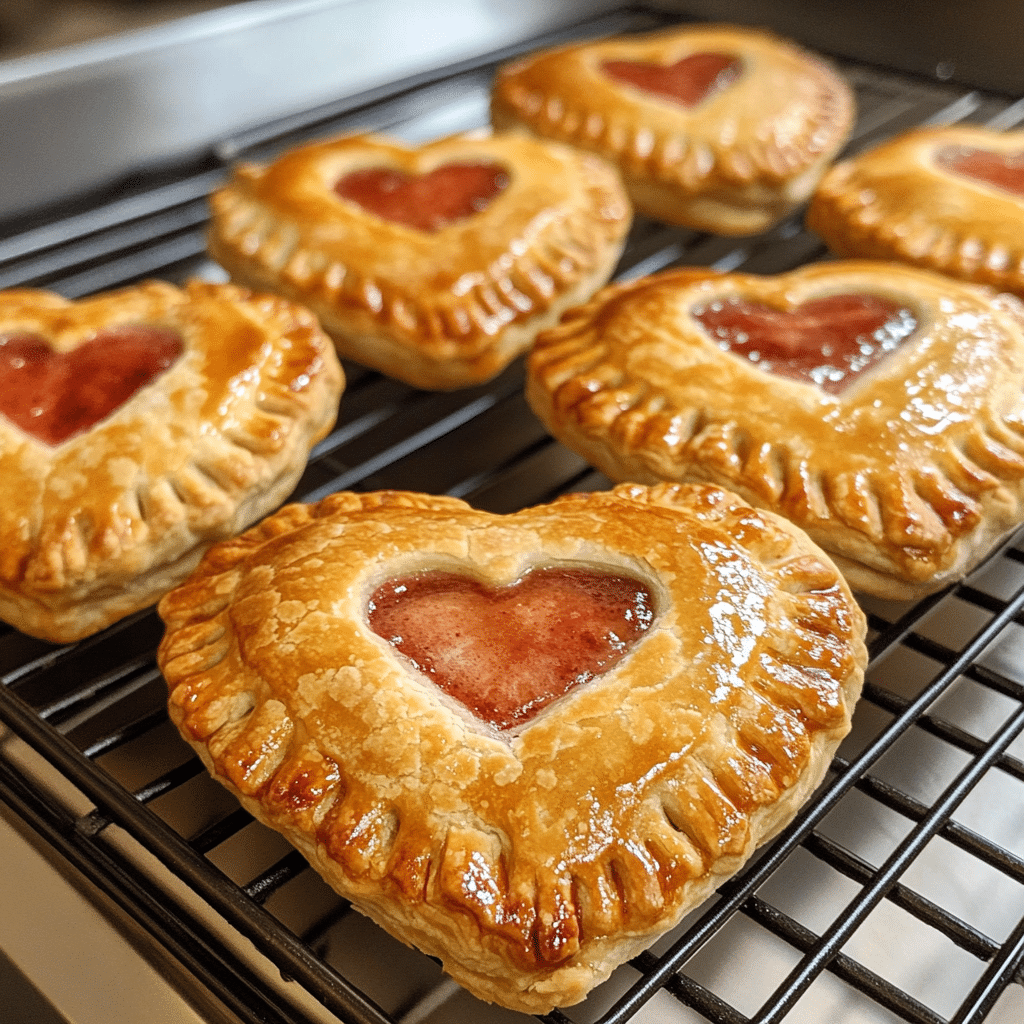
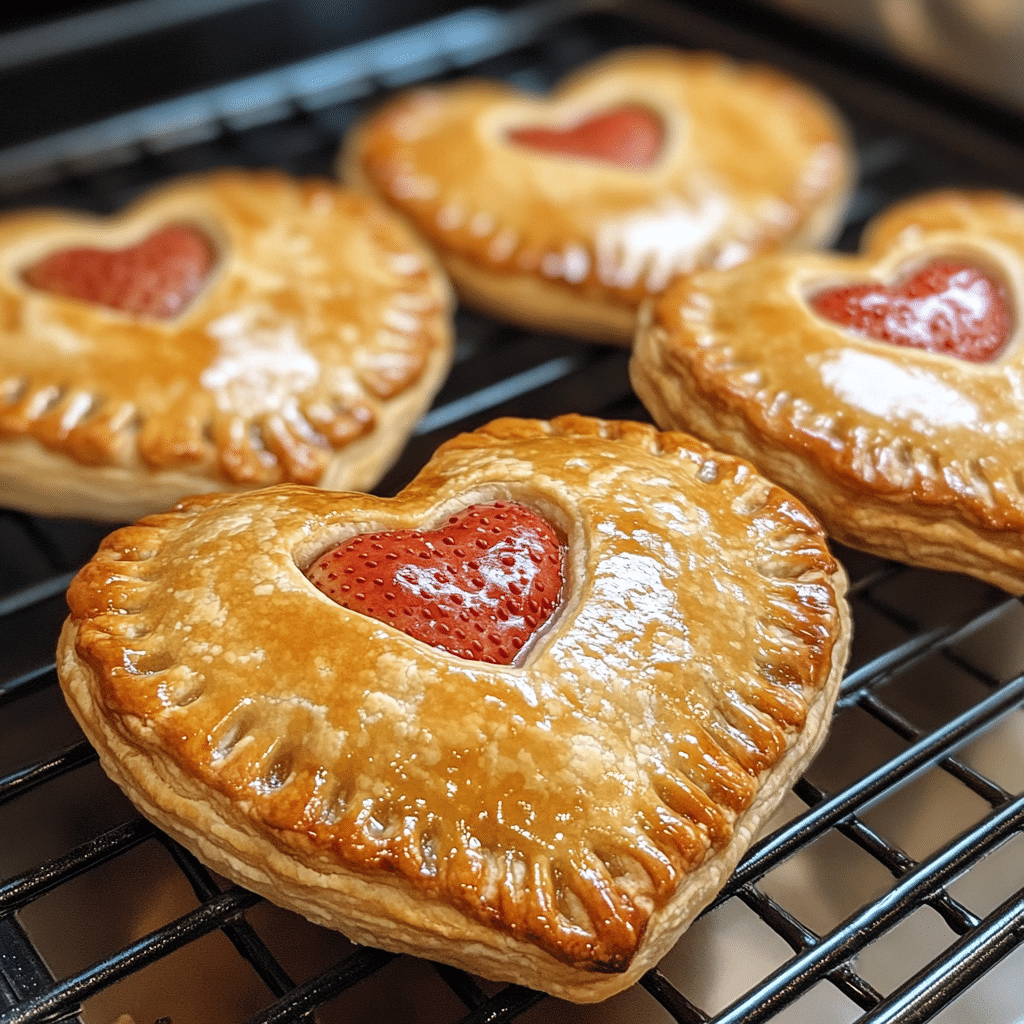
Valentine’s Day, a special occasion, or just a cozy evening at home—these Heart Shaped Strawberry Hand Pies are the perfect treat for any occasion. With a sweet strawberry filling tucked inside a flaky, golden crust and finished with a drizzle of icing, these hand pies are as delightful to look at as they are to eat. The best part? They’re easy to make and fun to assemble, especially when using a heart-shaped cookie cutter to make them extra festive.
These hand pies are filled with a simple yet luscious strawberry filling made from fresh strawberries, maple syrup, and a little bit of cornstarch to thicken the sauce. Whether you’re baking for a special someone or simply indulging in a homemade dessert, these heart-shaped pies are sure to bring a smile to your face. Plus, they’re portable, which means you can enjoy this sweet treat on the go!
Why You’ll Love This Recipe
Heart Shaped Strawberry Hand Pies are a perfect combination of fresh fruit and rich, buttery pie crust. The filling has a natural sweetness thanks to the strawberries and maple syrup, while the cornstarch ensures that the filling is thick and gooey. The flaky pie crust adds the ideal texture contrast, making each bite a satisfying experience. And with the cute heart shape and optional icing drizzle, these pies are not only delicious but visually stunning—perfect for sharing with loved ones. They’re also customizable, and you can adjust the sweetness to suit your tastes.
Disclosure: This post contains affiliate links.If you click and make a purchase, I may earn a small commission at no extra cost to you.


Ingredients
For the Strawberry Filling:
- Strawberries, finely chopped
- Cornstarch
- Maple syrup
For the Pies:
- Egg (for egg wash)
- Premade pie crust
For the Icing:
- Powdered sugar
- Milk
- Vanilla extract
Variations
- Mixed Berry Filling: If you want to experiment with flavors, try using a combination of berries such as raspberries, blueberries, or blackberries along with the strawberries for a mixed berry filling.
- Gluten-Free Option: Use gluten-free pie crust for a gluten-free version of these heart-shaped hand pies.
- Vegan Version: For a vegan version, substitute the egg wash with a non-dairy milk wash and use a plant-based pie crust.
- Different Icing Flavors: You can add a touch of lemon zest or almond extract to the icing for a unique flavor twist.
- Jam Filling: If you’re short on time, you can substitute the homemade filling with store-bought strawberry jam or preserves.
How to Make the Recipe
Step 1: Prepare the Strawberry Filling
In a pot over low-medium heat, combine the chopped strawberries, cornstarch, and maple syrup. Stir frequently to prevent the mixture from burning, and cook for 10-15 minutes until the sauce thickens. Once the filling is ready, remove it from the heat and let it cool completely. (You can speed up this process by placing it in the refrigerator.)
Step 2: Roll Out the Pie Crust
Roll out the premade pie crust on a flat surface until it’s about 1/8 inch thick. Using a heart-shaped cookie cutter, cut out as many heart shapes as you can from the dough.
Step 3: Chill the Heart Shapes
Place the heart-shaped dough cutouts on a non-stick baking sheet or a cookie sheet lined with parchment paper. Set these hearts in the refrigerator while you roll out the next batch of dough.
Step 4: Apply the Egg Wash
In a small bowl, whisk the egg to create an egg wash. Use your finger or a pastry brush to apply the egg wash along the edges of each heart shape.
Step 5: Add the Filling
Spoon about one tablespoon of the cooled strawberry filling onto the center of the hearts on the baking sheet. Be careful not to overfill, as the filling may leak out when the pies are sealed.
Step 6: Seal the Pies
Gently stretch the remaining heart shapes and place them on top of the filled hearts. Use the tines of a fork to press down on the edges to seal the pies together.
Step 7: Vent the Pies
Use a small knife to carefully cut an “X” in the center of each heart to allow steam to escape while baking.
Step 8: Apply Egg Wash to the Tops
Brush the tops of each heart pie with the remaining egg wash to help them brown and crisp up in the oven.
Step 9: Chill and Preheat
Place the assembled heart pies in the refrigerator for about 15 minutes while you preheat your oven to 400°F (200°C).
Step 10: Bake the Hand Pies
Bake the hand pies in the preheated oven for 14-18 minutes, or until the tops are golden brown and the crust is flaky.
Step 11: Make the Icing
While the pies are baking, whisk together the powdered sugar, 2 tablespoons of milk, and vanilla extract in a small bowl. If the icing is too thick, add a teaspoon of milk at a time until you achieve the desired consistency.
Step 12: Drizzle with Icing
Once the pies are done baking, allow them to cool for a few minutes. Drizzle the icing over the top of the hand pies for a sweet finishing touch.
Step 13: Enjoy!
Once the icing sets, your heart-shaped strawberry hand pies are ready to be enjoyed. Serve them warm and share the love!

Tips for Making the Recipe
- Cool the Filling: Be sure to let the strawberry filling cool completely before using it in the hand pies. If the filling is too warm, it could cause the dough to become soggy.
- Don’t Overfill: When adding the filling to the dough, use only one tablespoon to prevent the filling from spilling out while baking.
- Seal Well: Make sure the edges of the pies are tightly sealed before baking to avoid any filling leaks during cooking.
- Chill the Dough: Chilling the dough before and after assembly helps the pies maintain their shape during baking and results in a flakier crust.
How to Serve
These heart-shaped strawberry hand pies are perfect as a dessert for a special occasion or as an afternoon snack with tea or coffee. Serve them on a dessert platter, or individually wrapped for a fun gift. They’re perfect for Valentine’s Day, anniversaries, or any time you want to surprise someone with a sweet homemade treat.
Make Ahead and Storage
Storing Leftovers
Once cooled, store any leftover hand pies in an airtight container at room temperature for up to 2 days. If you want to keep them fresh longer, refrigerate them for up to 4 days.
Freezing
To freeze the hand pies, place them in a single layer on a baking sheet and freeze them for 1-2 hours. Then transfer the frozen pies to a freezer bag or airtight container. They can be stored in the freezer for up to 3 months. To reheat, bake from frozen at 375°F (190°C) for 12-15 minutes or until golden brown.
Reheating
Reheat hand pies in the oven at 350°F (175°C) for 5-7 minutes, or in the microwave for 20-30 seconds, until warmed through.
FAQs
1. Can I use frozen strawberries for the filling?
Yes, you can use frozen strawberries. Just make sure to thaw and drain them before cooking the filling.
2. Can I use a different fruit for the filling?
Absolutely! You can use other fruits like raspberries, blueberries, or cherries for a different flavor. Just adjust the sweetness as needed.
3. Can I make these pies without the icing?
Yes, the pies are delicious even without the icing. You can enjoy them plain or with a dusting of powdered sugar instead.
4. Can I make these hand pies with homemade pie crust?
Yes, feel free to use your favorite homemade pie crust instead of premade dough for a more personalized touch.
5. How can I make the filling thicker?
If you prefer a thicker filling, add a bit more cornstarch and cook the mixture for a few extra minutes.
6. Can I make these pies ahead of time?
Yes, you can prepare the pies in advance and refrigerate them before baking. Simply bake them fresh when you’re ready to serve.
7. Can I make these pies in a different shape?
Yes, you can use any cookie cutter shape to make these hand pies, or even use circles for a more traditional pie look.
8. Can I freeze the unbaked hand pies?
Yes, you can freeze the unbaked hand pies before applying the egg wash. When ready to bake, simply brush with the egg wash and bake as directed.
9. Can I use a different sweetener instead of maple syrup?
Yes, you can substitute maple syrup with honey or agave syrup for a slightly different flavor.
10. How do I prevent the hand pies from leaking during baking?
Seal the edges tightly with a fork and avoid overfilling the pies. The X in the center will also help prevent leaks.
Conclusion
These Heart Shaped Strawberry Hand Pies are the ultimate sweet treat for any occasion, filled with a luscious strawberry filling and encased in a golden, flaky crust. The heart shape makes them perfect for special occasions, while the easy-to-make recipe ensures you’ll have them on your table in no time. With their sweet strawberry flavor and buttery crust, these hand pies are sure to become a beloved dessert that you’ll want to make again and again.
Print
Heart Shaped Strawberry Hand Pies
- Total Time: 48 minutes
- Yield: 12 hand pies 1x
Description
These adorable Heart Shaped Strawberry Hand Pies are perfect for any occasion, especially Valentine’s Day! With a sweet, homemade strawberry filling and a flaky, golden crust, these hand pies are the perfect treat. Drizzle with a light powdered sugar icing and enjoy these warm, gooey delights that are as delicious as they are cute!
Ingredients
For the Strawberry Filling:
- 2 cups strawberries, finely chopped
- 1 tablespoon cornstarch
- 3 tablespoons maple syrup
For the Hand Pies:
- 1 egg (for egg wash)
- Premade pie crust
For the Icing:
- 1 cup powdered sugar
- 2–3 tablespoons milk
- 1/2 teaspoon vanilla extract
Instructions
- Make the strawberry filling: In a pot, combine chopped strawberries, cornstarch, and maple syrup. Cook over low-medium heat for 10-15 minutes, stirring frequently until the sauce thickens. Remove from heat and let it cool completely (refrigerating it speeds up the cooling process).
- Prepare the pie crust: Roll out the premade pie crust to about 1/8-inch thickness on a lightly floured surface.
- Cut the hearts: Use a heart-shaped cookie cutter to cut out heart shapes from the pie dough.
- Refrigerate the hearts: Place the cut-out hearts on a non-stick baking sheet or parchment-lined cookie sheet and refrigerate them while you cut out the next batch of hearts.
- Prepare the egg wash: Whisk the egg in a small bowl and gently brush the egg wash on the edges of each heart shape.
- Fill the pies: Place about one tablespoon of strawberry filling onto the center of each heart (don’t overfill to avoid spillage).
- Assemble the pies: Gently stretch the remaining heart shapes and place them on top of the filled hearts. Use the tines of a fork to press down the edges and seal the pies.
- Vent the pies: Use a small knife to cut an X in the center of each hand pie to allow for ventilation while baking.
- Brush with egg wash: Brush the tops of each pie with the remaining egg wash.
- Refrigerate before baking: Chill the hand pies in the refrigerator for 15 minutes while preheating the oven to 400°F (200°C).
- Bake: Place the pies in the preheated oven and bake for 14-18 minutes, or until the top crust is golden brown.
- Make the icing: While the pies bake, whisk together powdered sugar, 2 tablespoons milk, and vanilla extract in a small bowl. If the icing is too thick, add 1 teaspoon of milk at a time until you reach your desired consistency.
- Finish and serve: Drizzle the icing over the cooled pies and enjoy!
Notes
- For a fun twist, you can add a few chocolate chips to the strawberry filling before sealing the pies.
- If you prefer a shiny top on your pies, you can add an additional egg wash before baking.
- These hand pies are best enjoyed fresh, but they can be stored in an airtight container for up to 2 days.
- Prep Time: 30 minutes
- Cook Time: 18 minutes
- Category: Dessert
- Method: Baking
- Cuisine: American