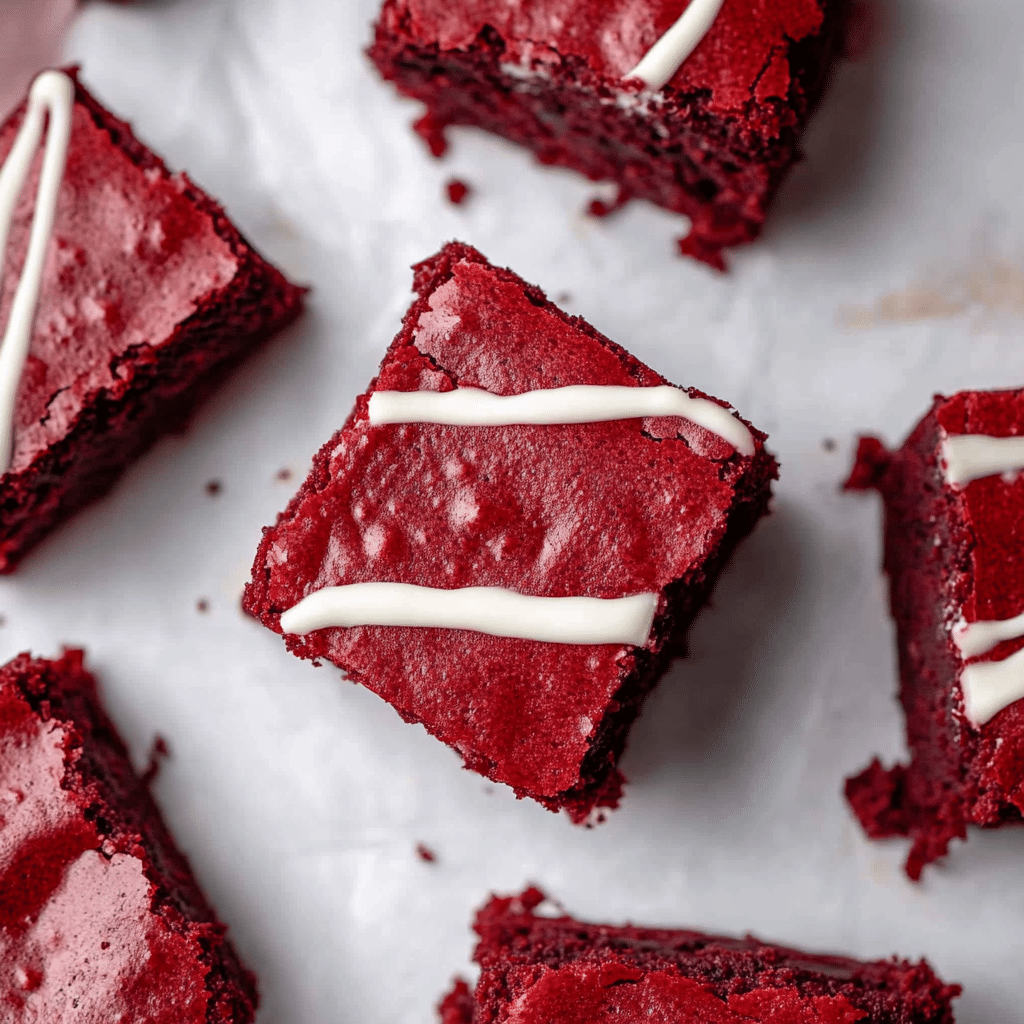
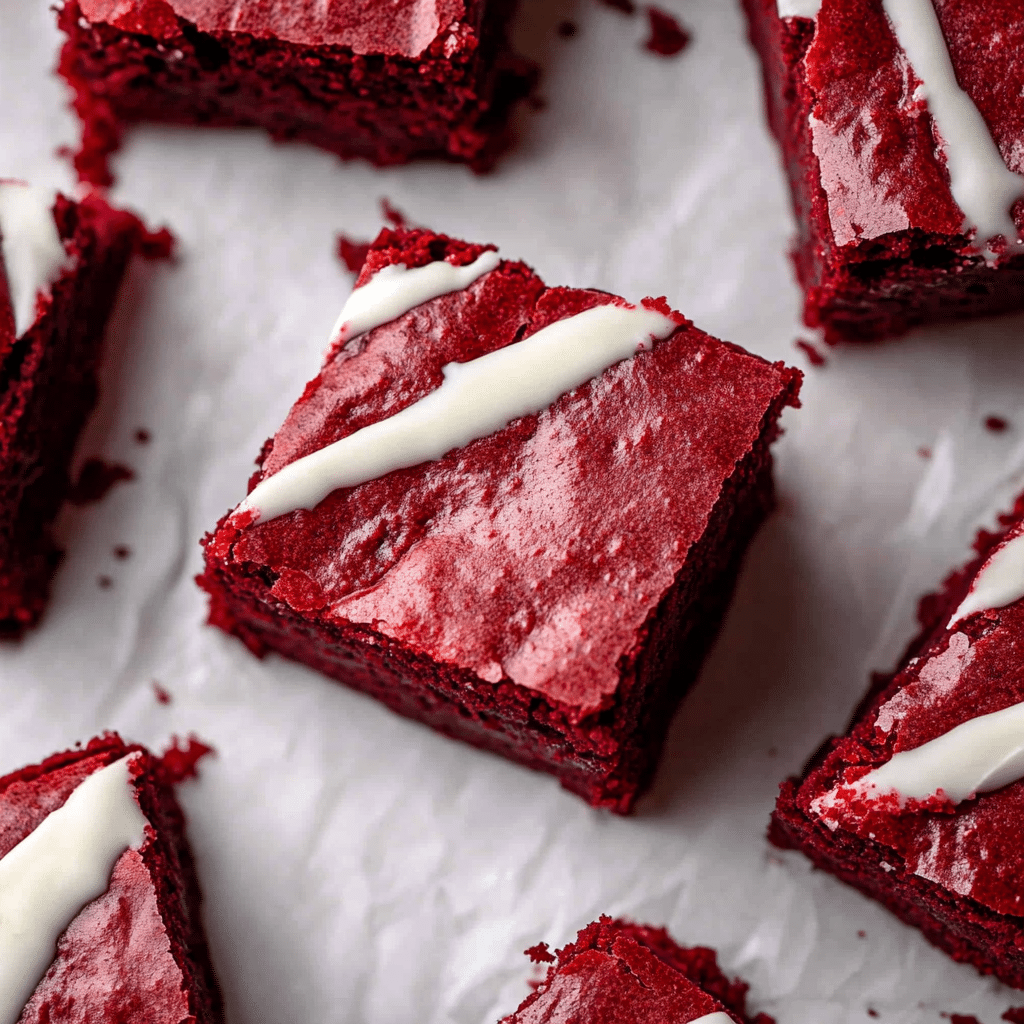
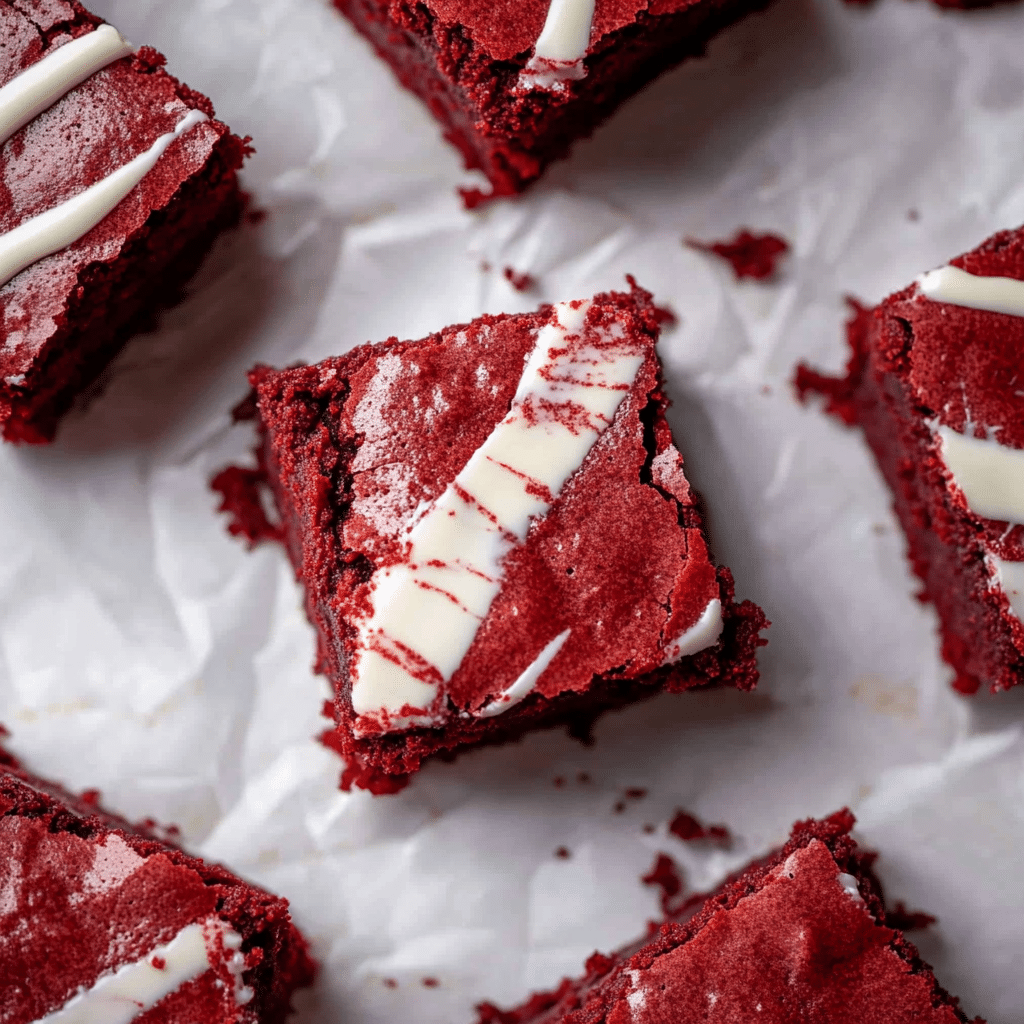
Red velvet desserts are a classic favorite, and these fudgy red velvet brownies take that beloved flavor to a new level. Rich, dense, and incredibly fudgy, these brownies combine the luxurious taste of red velvet cake with the indulgence of a gooey chocolate brownie. The hint of tang from the vinegar and the splash of vibrant red color make them as visually stunning as they are delicious. Whether you’re serving them for a special occasion or just indulging in a sweet treat, these red velvet brownies will undoubtedly become a go-to dessert.
Why You’ll Love This Recipe
1. Rich, Fudgy Texture
These red velvet brownies are incredibly fudgy and dense, providing that perfect chewy texture that melts in your mouth. The combination of melted semi-sweet chocolate and butter creates a rich base that gives the brownies their decadent consistency.
2. Vibrant and Beautiful Color
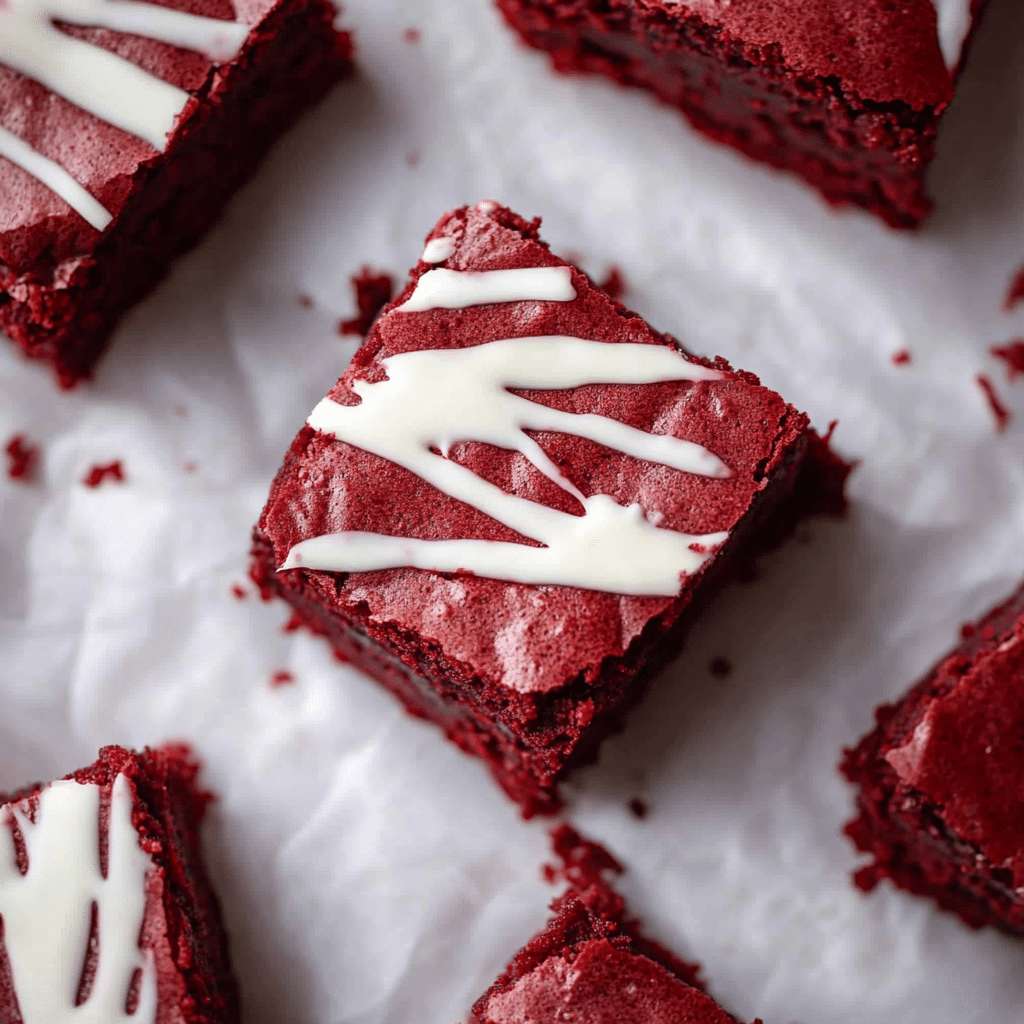
The vibrant red hue of these brownies makes them not only a treat for the taste buds but also for the eyes. The bright red color is the signature trait of red velvet desserts and adds a fun pop to any dessert table.
3. Chocolatey, Yet Lightly Tangy Flavor
The slight tang from the vinegar pairs perfectly with the richness of the chocolate, creating a well-balanced flavor profile. The cocoa powder enhances the chocolate flavor while still keeping the red velvet signature in the foreground.
4. Easy to Make
These brownies come together quickly and require no special equipment. With simple ingredients and minimal steps, you can easily make this dessert even on a busy day.
5. Optional White Chocolate Drizzle
To make these brownies even more indulgent, you can add a drizzle of melted white chocolate or mix white chocolate chips directly into the batter. This extra touch adds a creamy sweetness that contrasts beautifully with the tangy red velvet flavor.
Disclosure: This post contains affiliate links.If you click and make a purchase, I may earn a small commission at no extra cost to you.

Ingredients
For the Brownies:
- ¾ cup unsalted butter, melted
- 2 oz chopped semi-sweet chocolate bar
- 1 & ¼ cup granulated sugar
- 2 large eggs
- 2 teaspoon vanilla extract
- 1 teaspoon white vinegar
- ½ tablespoon red gel food coloring
- 2 tablespoons unsweetened cocoa powder
- 1 & ¼ cup all-purpose flour
- ¼ teaspoon salt
- ½ cup white chocolate chips (optional, can be mixed in the batter or melted and drizzled on top)
Variations
- Cream Cheese Swirl: For a red velvet cake-like touch, you can swirl a cream cheese mixture into the brownies before baking. Combine cream cheese, sugar, and vanilla, then drop spoonfuls onto the brownie batter and swirl with a knife.
- Nutty Addition: If you like a bit of crunch, add chopped walnuts or pecans into the batter for extra texture and flavor.
- White Chocolate Brownies: Add more white chocolate chips into the batter for a more decadent and creamy taste throughout the brownies.
- Gluten-Free Version: Substitute the all-purpose flour with a gluten-free flour blend for a gluten-free version of these delicious red velvet brownies.
How to Make the Recipe
Step 1: Prepare the Oven and Baking Pan
Preheat your oven to 350°F (175°C). Grease and line an 8×8-inch baking pan with parchment paper, allowing a little overhang on the sides to easily lift the brownies out once baked.
Step 2: Melt the Butter and Chocolate
In a microwave-safe bowl, melt the butter and chopped semi-sweet chocolate together in 20-second intervals, stirring between each, until smooth and fully combined. Set aside to cool slightly.
Step 3: Mix the Wet Ingredients
In a large mixing bowl, whisk together the granulated sugar, eggs, vanilla extract, white vinegar, and red gel food coloring until smooth and well-combined. Add the melted butter and chocolate mixture to the bowl and stir until everything is fully incorporated.
Step 4: Add the Dry Ingredients
Sift in the unsweetened cocoa powder, flour, and salt into the wet ingredients. Stir everything together until just combined—be careful not to overmix.
Step 5: Add the White Chocolate Chips
If using, fold in the white chocolate chips into the batter.
Step 6: Bake the Brownies
Pour the brownie batter into the prepared baking pan and spread it out evenly. Bake in the preheated oven for 25-30 minutes, or until a toothpick inserted into the center comes out with a few moist crumbs but not wet batter. Be careful not to overbake, as you want them to remain fudgy.
Step 7: Cool and Serve
Allow the brownies to cool in the pan for about 10 minutes, then lift them out using the parchment paper overhang and let them cool completely on a wire rack before cutting into squares. For an extra indulgent touch, drizzle melted white chocolate over the top of the cooled brownies.
Tips for Making the Recipe
- Do Not Overmix the Batter: To maintain a fudgy texture, mix the batter until just combined. Overmixing can result in dense, cakey brownies.
- Use Gel Food Coloring: Gel food coloring gives a more vibrant red color and doesn’t affect the texture of the batter as liquid food coloring can.
- Check for Doneness: Start checking the brownies around 25 minutes by inserting a toothpick into the center. You want it to come out with moist crumbs but not wet batter.
- Use a Light Hand with the White Chocolate: If you’re adding white chocolate chips to the batter, don’t overdo it. Just enough to add a creamy contrast without overpowering the red velvet flavor is key.
How to Serve
Serve these brownies as they are for a simple yet elegant dessert, or with a scoop of vanilla ice cream for an extra indulgent treat. They also pair beautifully with a cup of coffee or a cold glass of milk.
Make Ahead and Storage
Storing Leftovers
Store the brownies in an airtight container at room temperature for up to 4 days. They may also be stored in the fridge to extend their shelf life.
Freezing
These brownies freeze exceptionally well. Once cooled, wrap them individually in plastic wrap and place them in a freezer-safe bag or container. They will keep for up to 3 months. To thaw, simply leave them at room temperature for a few hours or microwave for 20-30 seconds.
Reheating
To reheat, warm individual brownies in the microwave for about 15-20 seconds or in a 350°F oven for 5 minutes until warm.
FAQs
1. Can I use liquid food coloring instead of gel?
While gel food coloring is recommended for the best color, you can use liquid food coloring. However, you may need to add a bit more, and it could slightly alter the texture.
2. Can I use milk chocolate instead of semi-sweet chocolate?
Yes, you can use milk chocolate if you prefer a sweeter, creamier flavor, though the result will be slightly less rich.
3. How do I know when the brownies are done?
Insert a toothpick into the center of the brownies. If it comes out with a few moist crumbs (not wet batter), they’re done.
4. Can I make these brownies ahead of time?
Yes, you can bake the brownies in advance and store them at room temperature or in the fridge for up to 4 days.
5. Can I use dark chocolate instead of semi-sweet chocolate?
Dark chocolate can be used for a richer, slightly more bitter flavor, but it will affect the overall sweetness of the brownies.
6. Can I make these brownies without food coloring?
Yes, the food coloring is optional, but it’s what gives these brownies their signature red velvet appearance. You can skip it for a traditional chocolate brownie.
7. Can I add nuts to the brownies?
Yes, you can add chopped walnuts or pecans if you like a bit of crunch in your brownies.
8. Can I use a different type of chocolate in the recipe?
You can substitute the semi-sweet chocolate with milk or dark chocolate for different flavor profiles.
9. How long will the brownies last?
The brownies will last for up to 4 days at room temperature in an airtight container or up to 3 months in the freezer.
10. How can I make these brownies gluten-free?
Substitute the all-purpose flour with a gluten-free flour blend, making sure it has xanthan gum for structure.
Conclusion
These fudgy red velvet brownies are the ultimate combination of rich chocolate and tangy red velvet flavor. They’re perfect for any occasion and are sure to impress with their vibrant color and decadent taste. Whether served plain or topped with melted white chocolate, these brownies will quickly become a favorite in your dessert repertoire.
Print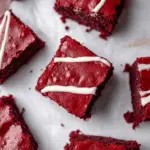
The Best Fudgy Red Velvet Brownies Recipe
- Total Time: 40 minutes
- Yield: 16 brownies
Description
These fudgy red velvet brownies are rich, decadent, and have the perfect balance of cocoa flavor and vibrant red color. With a dense, moist texture and a hint of vanilla and chocolate, these brownies are topped off with white chocolate chips or a drizzle of melted white chocolate for an extra indulgent treat.
Ingredients
-
¾ cup unsalted butter, melted
-
2 oz chopped semi-sweet chocolate bar
-
1 ¼ cups granulated sugar
-
2 large eggs
-
2 teaspoons vanilla extract
-
1 teaspoon white vinegar
-
½ tablespoon red gel food coloring
-
2 tablespoons unsweetened cocoa powder
-
1 ¼ cups all-purpose flour
-
¼ teaspoon salt
-
½ cup white chocolate chips (optional, for mixing in the batter or drizzling on top)
Instructions
-
Preheat the Oven:
-
Preheat your oven to 350°F (175°C). Line an 8×8-inch baking pan with parchment paper or lightly grease it.
-
-
Melt the Butter and Chocolate:
-
In a medium saucepan, melt the unsalted butter and chopped semi-sweet chocolate together over low heat, stirring frequently. Once melted, remove from heat and allow to cool slightly.
-
-
Mix the Wet Ingredients:
-
In a large mixing bowl, whisk together the granulated sugar, eggs, vanilla extract, white vinegar, and red gel food coloring until smooth and well combined.
-
-
Combine the Dry Ingredients:
-
In a separate bowl, sift together the unsweetened cocoa powder, all-purpose flour, and salt.
-
-
Mix the Batter:
-
Gradually add the dry ingredients into the wet ingredients, mixing until combined. Then pour in the melted butter and chocolate mixture, stirring until fully incorporated.
-
-
Add White Chocolate Chips:
-
If using white chocolate chips, fold them into the brownie batter.
-
-
Bake:
-
Pour the brownie batter into the prepared baking pan, spreading it evenly.
-
Bake for 30-35 minutes, or until a toothpick inserted into the center comes out with just a few moist crumbs. Be careful not to overbake, as the brownies should remain fudgy.
-
-
Cool and Serve:
-
Let the brownies cool in the pan for about 10-15 minutes before transferring them to a wire rack to cool completely. If desired, drizzle with melted white chocolate and serve.
-
Notes
-
If you prefer a more intense red color, feel free to add a bit more red food coloring.
-
You can swap out the semi-sweet chocolate bar for chocolate chips if that’s more convenient.
- For an extra treat, serve the brownies with a scoop of vanilla ice cream or whipped cream.
- Prep Time: 10 minutes
- Cook Time: 30 minutes
- Category: Dessert
- Method: Baking
- Cuisine: American