
Soft, juicy chicken strips with a crisp cornflake finish and a tender center is exactly what makes Crispy Crunchy Chicken Tenders so hard to stop eating. This specific method uses crushed cereal to create a texture that stays crunchy much longer than traditional breadcrumbs. From homemademenus.com, this recipe is a family favorite for busy weeknights.
This recipe yields about four servings and takes roughly 45 minutes from start to finish, including marinating time. I like to prepare these for weekend game nights because they are easy to hold and even easier to dip. Carmen Maria Márquez often suggests that the secret to the best poultry is allowing the spices to penetrate the meat before the breading process begins.
The combination of savory spices like paprika and thyme with the natural sweetness of cornflakes creates a flavor profile that appeals to both kids and adults. Once you try this homemade version, you will likely skip the frozen aisle forever. Let’s dive into what makes these tenders the ultimate comfort food for any occasion.
Why This Recipe Is a Keeper
What Makes It Special
The use of cornflakes provides a unique, jagged surface area that traps heat and stays remarkably brittle after frying. Unlike flour-only coatings, this golden crust offers a satisfying “shatter” with every single bite.
This method ensures the chicken remains moist inside while the exterior achieves a deep golden hue without burning. It is a reliable technique for anyone wanting restaurant-quality results at home with simple pantry staples.
- Soft texture: The milk and egg wash keeps the white meat succulent.
- Quick method: Shallow frying takes less than ten minutes per batch.
- Bold flavor: A blend of six different spices ensures every bite is seasoned.
- Great yield: This recipe easily feeds a family of four with premium value and high-quality protein.
Ingredients: What You’ll Need
Key Ingredients
For the best results, use exact measurements for the dredging station to ensure the coating adheres perfectly to the chicken strips. Do not substitute the cornflakes for sugary cereals, as the plain variety is essential for the savory balance.
Using high quality chicken breast ensures a clean flavor and a tender bite that isn’t chewy or stringy. Freshly crushed cereal provides a much better texture than pre-crushed crumbs found in boxes.
- 1.1 lbs (500 g) Chicken breast: Cut into even 1-inch thick strips.
- 2 cups All-purpose flour: Used for the initial coating to lock in moisture.
- 2 cups Crushed cornflakes: The secret to the signature crunch.
- 2 Large eggs: Acts as the binder for the cereal crumbs.
- 1/2 cup Milk: Thins the egg wash for a lighter coating.
- 1 tsp Garlic powder: Adds a classic savory depth.
- 1 tsp Onion powder: Complements the garlic and chicken.
- 1 tsp Paprika: Provides a subtle smokiness and rich color.
- 1 tsp Black pepper: Essential for a little bit of heat.
- 1 tsp Salt: Enhances all the individual spice notes.
- 1/2 tsp Dried thyme: Adds an earthy, herbal undertone.
- 1/2 tsp Chili powder: Optional for those who want a tiny kick.
- 1 tbsp Seasoning powder: Use your favorite poultry or all-purpose blend.
- Oil for frying: Use a high-smoke point oil like vegetable or canola.
- Fresh parsley: Minced for a bright, professional garnish.
How to Make Crispy Crunchy Chicken Tenders
Step-by-Step
Preparing these tenders requires a simple three-bowl station to keep the process organized and your kitchen counters clean. It is important to work in batches so the oil temperature remains consistent throughout the cooking process.
Using a medium-high heat allows the chicken to cook through exactly at the same time the crust becomes perfectly golden. If the oil is too cold, the breading will absorb too much fat and become greasy.

Disclosure: This post contains affiliate links.If you click and make a purchase, I may earn a small commission at no extra cost to you.

- Season: Mix the chicken strips with salt, paprika, garlic, onion powder, pepper, thyme, and chili powder; marinate for 30 minutes.
- Station Prep: Set up three bowls: one with flour, one with whisked eggs and milk, and one with crushed cornflakes.
- Coat: Dredge each strip in flour, dip in the egg mixture, and press firmly into the cornflakes until fully covered.
- Fry: Heat oil in a pan and fry the strips in batches until golden brown and cooked through, about 3-4 minutes per side.
- Drain: Place the finished chicken on a wire rack to maintain crunch while excess oil drips away.
- Garnish: Sprinkle with fresh parsley and serve immediately while the crust is at its peak.
My Best Tips
Pro Tips
According to Carmen Maria Márquez, the best way to crush cornflakes is in a sealed bag with a rolling pin to get varied crumb sizes. This mixture of small and large pieces creates the most interesting and crunchy exterior.
Always use a thermometer to check that the chicken reaches an internal temperature of 165 degrees Fahrenheit for safety. Measuring your oil temperature ensures the breading doesn’t burn before the meat is done.
- Double Dip: For an extra-thick crust, repeat the egg and cornflake steps a second time.
- Dry Hand/Wet Hand: Use one hand for dry ingredients and the other for the egg wash to avoid clumping.
- Don’t Overcrowd: Frying too many pieces at once drops the oil temperature and leads to soggy chicken.
Easy Variations
Simple Twists
While the classic version is hard to beat, you can easily adjust the spice levels to suit your specific palate. Adding different dried herbs can transform the dish into various international cuisines.
You can also experiment with the base cereal if you want to try different textures or flavors. Just ensure the alternative is not pre-sweetened or frosted.
- Spicier Version: Increase the chili powder or add a teaspoon of cayenne pepper to the flour.
- Herby Blend: Replace the thyme with dried oregano and basil for an Italian-style tender.
Fixing Common Issues
Troubleshooting
If you find that your coating is falling off, it is likely because the chicken was too wet before the flour stage. Ensure the strips are patted dry if they have excess moisture from the marinade.
If the chicken is dark on the outside but raw inside, your oil is too hot. Lower the flame and allow the oil to cool slightly before continuing with the next batch.
- Soggy Crust: Avoid placing hot chicken directly on a flat plate; use a wire rack instead.
- Bland Flavor: Ensure you season both the chicken itself and the flour mixture for layered taste.
How to Serve
Serving Ideas
Serve these warm with a side of honey mustard, barbecue sauce, or a spicy ranch dressing for the best experience. They pair wonderfully with a fresh garden salad or classic french fries for a complete meal.
For more information on the history of this dish, you can read about the versatile Chicken fingers or learn more about the nutritional value of Corn flakes. These tenders are best enjoyed immediately while the steam is still rising from the center.
Storage
Make Ahead
While these are best fresh, you can store leftovers in an airtight container in the refrigerator for up to four days. This provides long-term value for those who enjoy meal prepping for the week ahead.
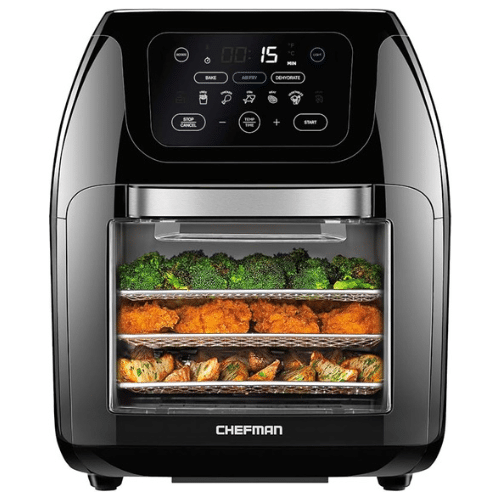
Reheating in an oven or air fryer is highly recommended over a microwave to restore the original crunch. Microwaving often makes the cornflake crust soft and chewy rather than crispy.
- To Store: Keep in the fridge for 4 days in a sealed container.
- To Freeze: Freeze cooked tenders for up to 3 months; reheat directly from frozen.
- To Reheat: Bake at 375°F for 10 minutes or air fry for 5 minutes at 350°F.
