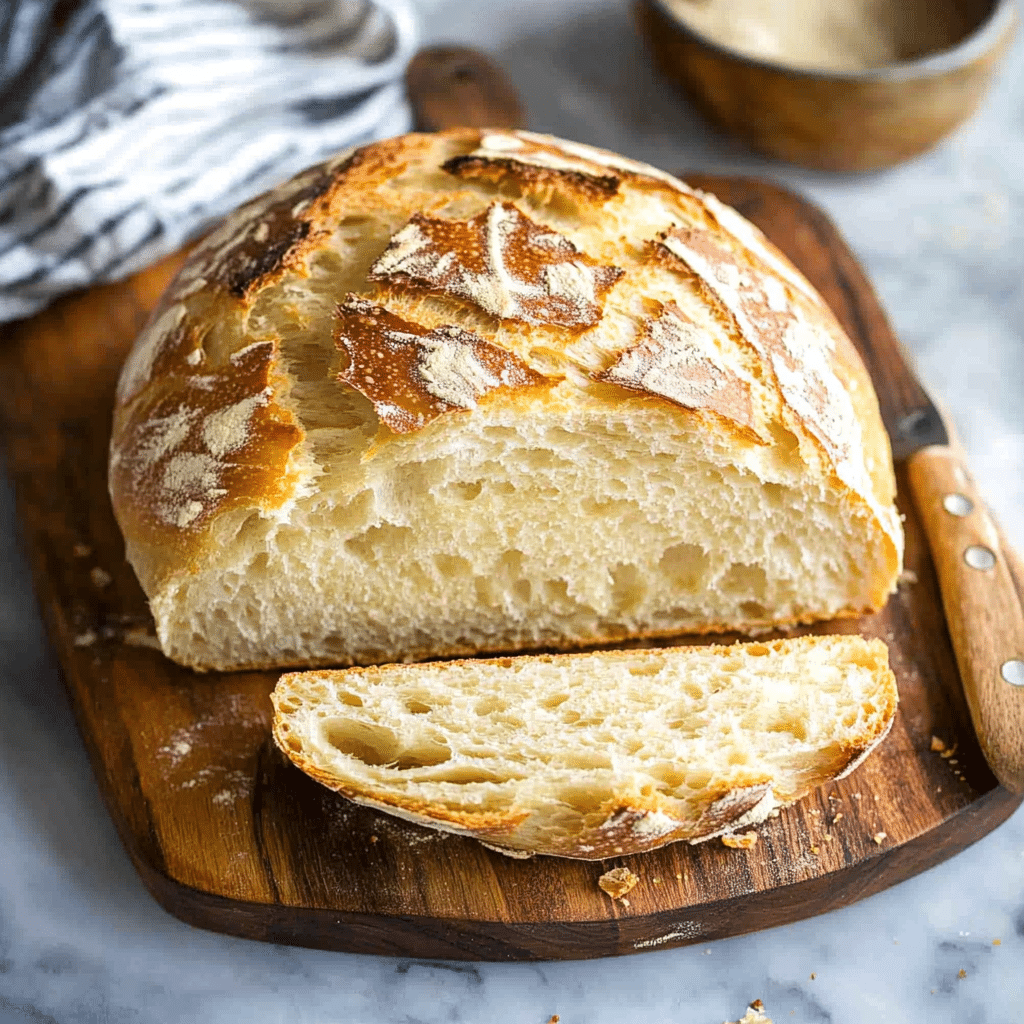
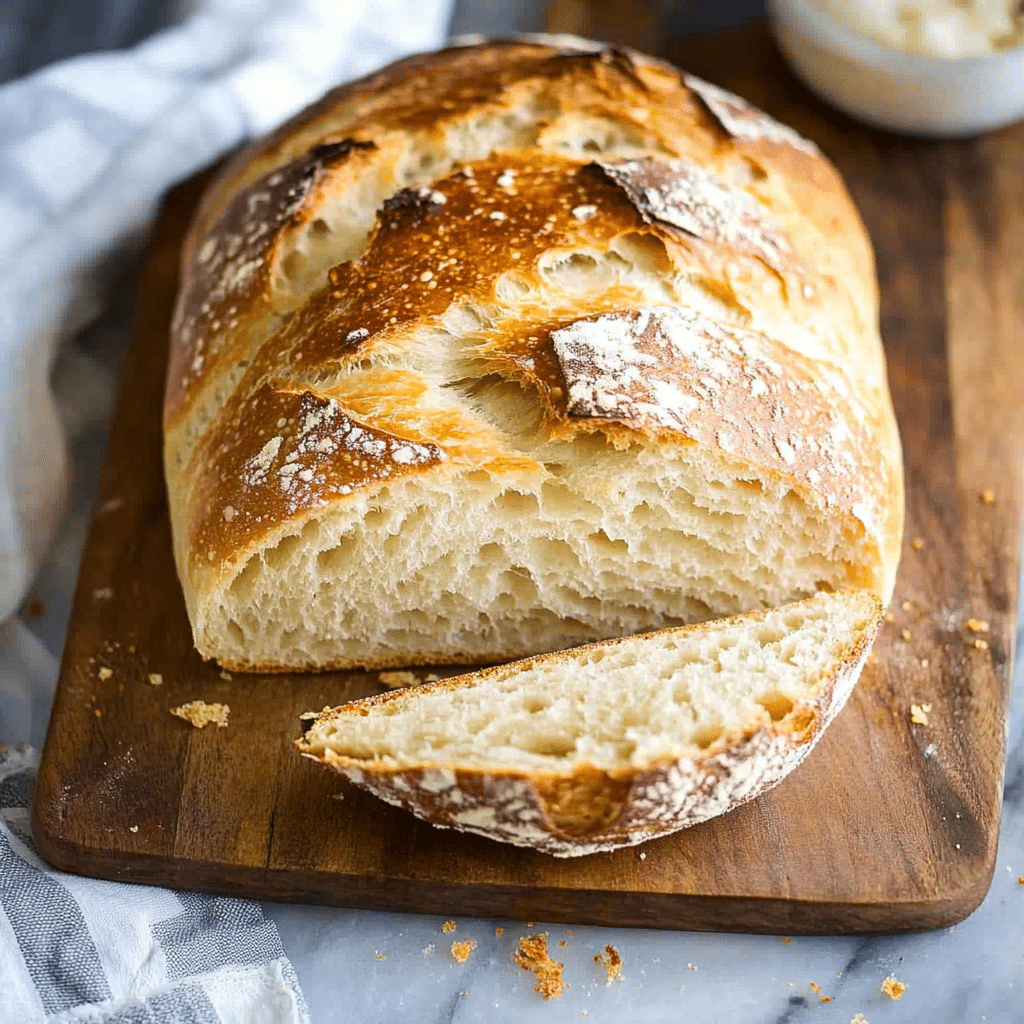
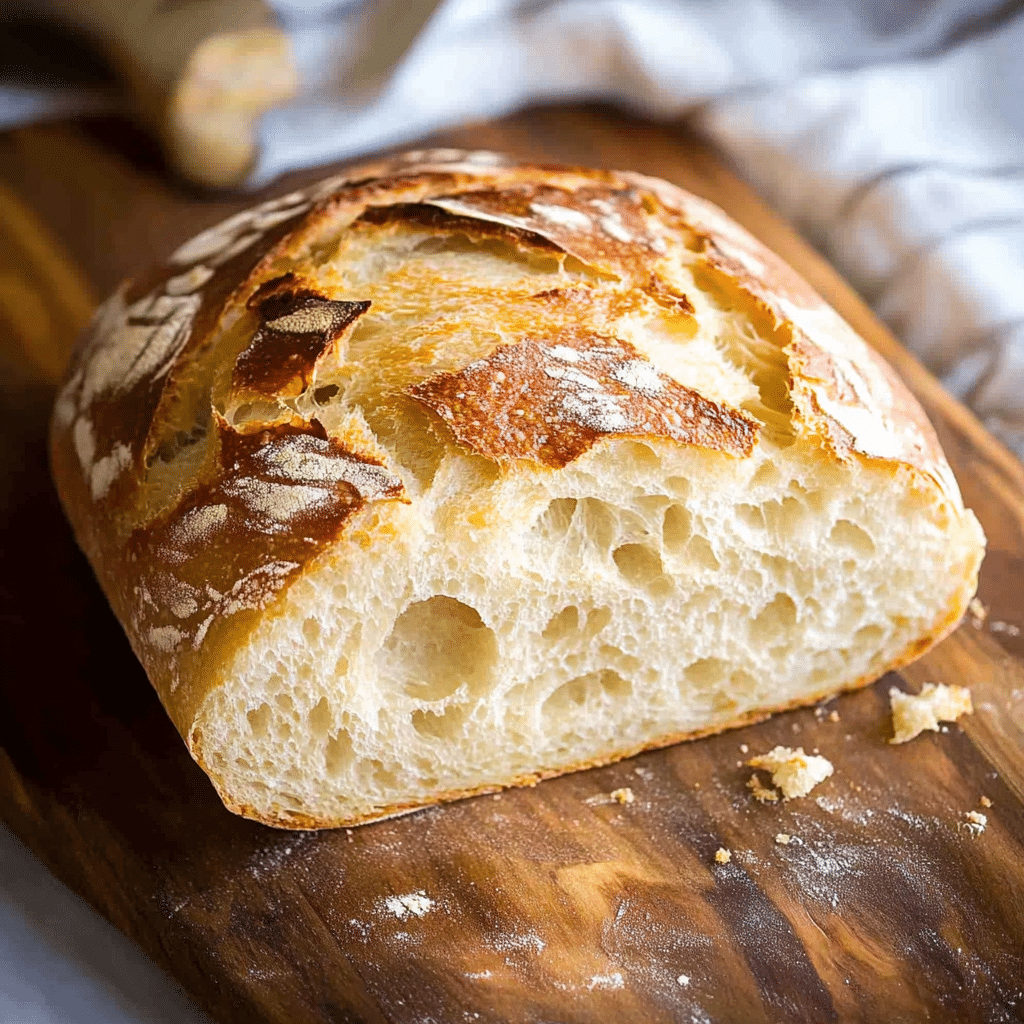
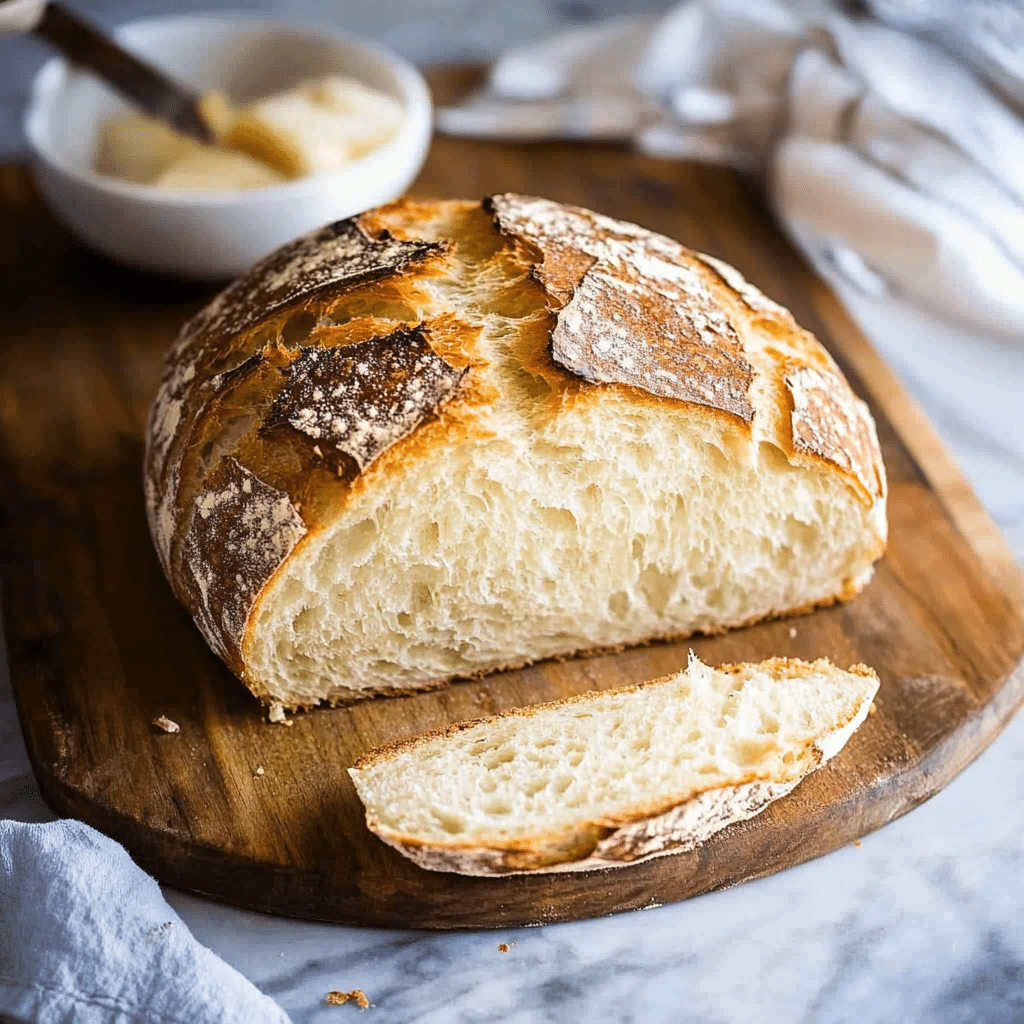
There’s nothing quite like the aroma of fresh, homemade bread filling your home. This Best No Knead Artisan Bread Recipe makes baking your own artisan bread easy and effortless. With only a few simple ingredients and minimal hands-on time, you can create a golden, crusty loaf of bread with a soft, airy interior. The no-knead method eliminates the need for intense mixing and kneading, making it an ideal recipe for beginners and busy bakers alike.
What makes this recipe stand out is the long fermentation time, which develops a rich flavor and texture without requiring constant attention. You can set the dough and let it rise, allowing the yeast to do all the hard work. Whether you’re making sandwiches, serving with soup, or enjoying a slice with butter, this no-knead bread will quickly become a staple in your kitchen.
Why You’ll Love This Recipe
This no-knead artisan bread is not only easy to make, but it’s also highly versatile. You can serve it with almost any dish, and it pairs perfectly with cheeses, dips, and spreads. The crispy crust and soft, chewy interior make each bite irresistible. With just a few minutes of active time and a few hours of resting, you can have a homemade loaf of bread that rivals anything you’d find in a bakery. It’s perfect for beginners and those looking for a stress-free bread-making experience.
Disclosure: This post contains affiliate links.If you click and make a purchase, I may earn a small commission at no extra cost to you.


Ingredients
- All-purpose flour
- Coarse sea salt
- Active dry yeast (or instant yeast)
- Warm water
Variations
This no-knead artisan bread recipe is highly customizable:
- Add Herbs or Garlic: For an aromatic touch, stir in some dried rosemary, thyme, or garlic powder into the dough.
- Add Cheese: Mix in some shredded cheese (cheddar, parmesan, or mozzarella) into the dough for a cheesy twist.
- Use Whole Wheat Flour: For a heartier flavor and texture, substitute part of the all-purpose flour with whole wheat flour.
- Add Seeds: Incorporate sunflower, sesame, or pumpkin seeds for a fun crunch and added texture.
How to Make the Recipe
Step 1: Mix the Dough
In a large mixing bowl, combine the all-purpose flour, sea salt, and yeast. Add the warm water and stir with a wooden spoon or your hands until the dough comes together. You don’t need to knead it; just mix until all the flour is hydrated.
Step 2: Let the Dough Rest
Cover the bowl with plastic wrap or a damp kitchen towel. Allow the dough to rest and rise at room temperature for about 12-18 hours. The dough should become bubbly and double in size, with a slightly sticky texture. The long rise time is key to developing the rich flavor and airy texture of the bread.
Step 3: Shape the Dough
Once the dough has risen, turn it out onto a lightly floured surface. Fold the edges of the dough into the center to form a rough ball. This doesn’t need to be perfect—just a basic round shape will work.
Step 4: Second Rise
Place the shaped dough onto a piece of parchment paper. Cover it with a towel and let it rest for another 1-2 hours, allowing it to rise and puff up further.
Step 5: Preheat the Oven
While the dough is having its second rise, preheat your oven to 450°F (230°C). If you’re using a Dutch oven, place it in the oven while it’s preheating so it gets nice and hot.
Step 6: Bake the Bread
Once the oven has reached temperature, carefully transfer the dough (with the parchment paper) into the preheated Dutch oven or onto a baking stone. Cover with a lid or another baking sheet and bake for 30 minutes. After 30 minutes, remove the lid and continue baking for an additional 15-20 minutes, until the bread is golden brown and sounds hollow when tapped on the bottom.
Step 7: Cool and Serve
Allow the bread to cool completely on a wire rack before slicing. This ensures the texture sets and makes for cleaner slices.
Tips for Making the Recipe
- Use a Dutch Oven: A Dutch oven helps create the steam needed for a crispy, artisan-like crust. If you don’t have one, you can bake the bread on a baking sheet, but the crust may not be as crispy.
- Water Temperature: Make sure the water is warm, around 110°F (43°C). If it’s too hot, it can kill the yeast, and if it’s too cold, the dough won’t rise properly.
- Don’t Skip the Rise Time: The longer fermentation allows the dough to develop more flavor and creates that beautiful open crumb. Patience is key!
- Check for Doneness: The bread should have a golden-brown crust and sound hollow when tapped on the bottom. An internal temperature of around 200°F (93°C) is perfect.
How to Serve
This no-knead artisan bread is incredibly versatile:
- For Sandwiches: Slice the bread thickly for the perfect sandwich. It pairs wonderfully with deli meats, cheese, and fresh vegetables.
- With Soup or Salad: Serve it alongside your favorite soup or salad. It’s excellent for dipping into soups or stews.
- As Toast: Slice and toast the bread for a perfect breakfast or snack. Top with butter, jam, or your favorite spread.
Make Ahead and Storage
Storing Leftovers
Store leftover artisan bread in a paper bag or bread box at room temperature for up to 3 days. If the bread starts to lose its freshness, you can reheat it in the oven to restore the crust.
Freezing
If you want to keep the bread longer, slice it and freeze the slices in a freezer-safe bag. This makes it easy to grab a slice whenever you need it. To thaw, simply leave it at room temperature or toast it directly from the freezer.
Reheating
To refresh the crust, preheat the oven to 350°F (175°C) and bake the bread for 5-10 minutes. Alternatively, you can reheat individual slices in a toaster or oven.
FAQs
1. Can I use active dry yeast instead of instant yeast?
Yes, you can substitute active dry yeast for instant yeast. Just be sure to dissolve it in the warm water before adding it to the flour mixture.
2. Can I use whole wheat flour?
Yes, you can substitute part of the all-purpose flour with whole wheat flour for a denser, nuttier bread. However, you may need to adjust the water content slightly since whole wheat flour absorbs more liquid.
3. Can I make this recipe without a Dutch oven?
Yes, you can bake this bread on a baking sheet or a pizza stone. To get a crispy crust, you can place a pan of water in the oven to create steam during baking.
4. How can I tell when the bread is done?
The bread should have a deep golden-brown crust and sound hollow when tapped on the bottom. You can also check the internal temperature with a thermometer—around 200°F (93°C) is perfect.
5. How long does the dough need to rise?
The dough needs to rise for at least 12-18 hours during the first rise, and another 1-2 hours for the second rise. This slow fermentation creates the best flavor and texture.
6. Can I add seeds or nuts to the dough?
Absolutely! You can stir in seeds (like sunflower or sesame) or chopped nuts into the dough before the first rise for added texture and flavor.
7. Can I freeze the dough before baking?
Yes, you can freeze the shaped dough after the second rise. Simply place it in a freezer-safe container and bake it directly from the freezer, adding a few extra minutes to the baking time.
8. Why does my bread have a dense texture?
If your bread is dense, it might need more time to rise. Make sure your dough has had enough time to ferment properly, and ensure the yeast is active.
9. Can I use this recipe for a loaf pan?
This recipe is specifically designed for a round or oval loaf, but you can bake it in a loaf pan if you prefer. Just be sure to adjust the baking time accordingly.
10. Can I make this recipe without salt?
You can omit the salt, but keep in mind it adds flavor and helps control the yeast’s activity. Without salt, the bread may taste bland and rise more quickly.
Conclusion
With this Best No Knead Artisan Bread Recipe, you can bake a rustic, golden loaf without the need for kneading or complex techniques. The long fermentation creates a flavorful bread with a crunchy crust and soft, airy crumb that’s perfect for any meal. Whether you’re a beginner or an experienced baker, this simple recipe will allow you to enjoy the magic of homemade artisan bread in your own kitchen. Happy baking!
Print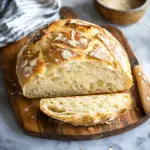
Best No Knead Artisan Bread Recipe
- Total Time: 12-18 hours (including resting time)
- Yield: 1 loaf (about 12 slices) 1x
- Diet: Vegetarian
Description
This no-knead artisan bread is simple to make with just a few ingredients. It’s the perfect recipe for beginners or anyone looking for a hands-off way to enjoy fresh, crusty, homemade bread with minimal effort and maximum flavor.
Ingredients
- 3 cups all-purpose flour
- 2 teaspoons coarse sea salt
- ½ teaspoon active dry yeast (or instant yeast)
- 1 ½ cups warm water (about 110°F)
Instructions
- In a large mixing bowl, combine the flour, salt, and yeast.
- Add the warm water and stir until a shaggy dough forms. The dough will be sticky and rough – this is normal for no-knead bread.
- Cover the bowl with plastic wrap or a damp towel and let it rest at room temperature for 12-18 hours. The dough should rise and become bubbly and slightly puffy.
- After the dough has rested, preheat your oven to 450°F (232°C). Place a heavy, oven-safe pot with a lid (like a Dutch oven) in the oven as it heats up.
- Once the oven has reached temperature, carefully remove the hot pot and place a piece of parchment paper inside. Turn the dough out onto the parchment paper and shape it into a round loaf. Don’t worry about perfect shape; rustic is the goal.
- Carefully lift the dough using the parchment paper and place it into the preheated pot. Cover the pot with the lid.
- Bake for 30 minutes with the lid on. After 30 minutes, remove the lid and bake for an additional 10-15 minutes until the bread has a golden, crispy crust.
- Remove the bread from the pot and let it cool on a wire rack for at least 30 minutes before slicing.
Notes
- For best results, let the dough rise for the full 18 hours to develop maximum flavor.
- If you don’t have a Dutch oven, you can use any oven-safe pot with a lid or cover the loaf with aluminum foil.
- Make sure your water is warm (but not hot) to properly activate the yeast.
- Prep Time: 10 minutes
- Cook Time: 45 minutes
- Category: Bread
- Method: Baking
- Cuisine: American