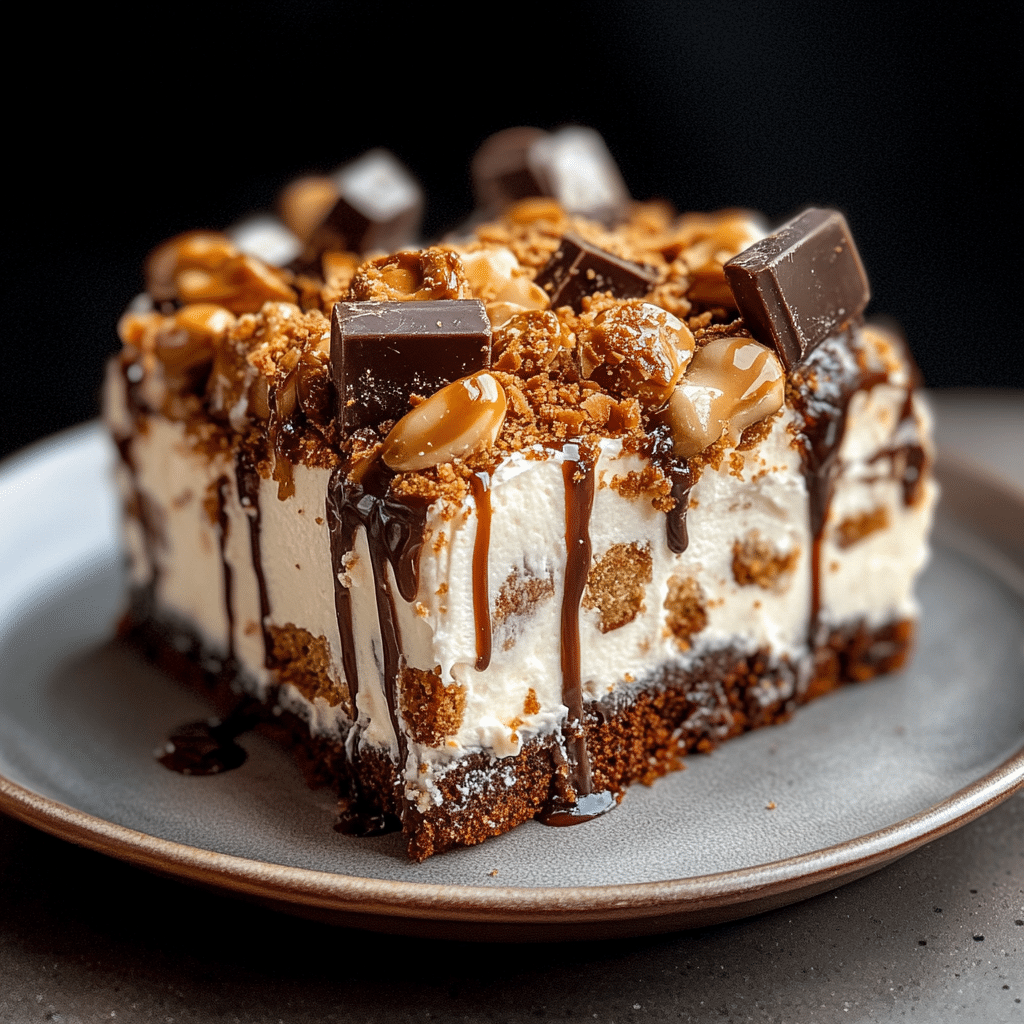
If you have a sweet tooth and love the crunch of candy bars mixed with creamy cake, the Butterfinger Candy Bar Poke Cake is an absolute dream come true. This delicious dessert combines the rich layers of moist cake infused with a luscious filling and topped with chopped Butterfinger candy bars for irresistible texture and flavor. Whether you’re looking for a show-stopping dessert for a party or a delightful treat to satisfy your cravings, the Butterfinger Candy Bar Poke Cake guarantees smiles all around.
Why You’ll Love This Recipe
- Unexpected Texture: The crunchy Butterfinger pieces add a delightful contrast to the soft, moist cake.
- Easy to Make: This recipe uses straightforward ingredients with simple steps, perfect for bakers of all levels.
- Perfectly Balanced Sweetness: A sweet yet not overpowering blend of chocolate, peanut butter, and buttery flavors.
- Eye-Catching Presentation: Gorgeous layers with colorful candy pieces make it a crowd-pleaser at any event.
- Versatile Dessert: Works great as a birthday cake, potluck offering, or weekend indulgence.
Ingredients You’ll Need
Gathering the right ingredients is more than half the fun with the Butterfinger Candy Bar Poke Cake. Each component brings its own special touch—moisture, creaminess, crunch, or flavor—to this layered treat.
- Box Cake Mix: Choose your favorite chocolate or vanilla boxed cake mix for an easy and reliable base.
- Sweetened Condensed Milk: Creates a smooth, rich filling that seeps perfectly into the cake holes.
- Instant Pudding Mix: Adds creamy texture and helps make the filling thicker and fluffier.
- Whipped Topping (Cool Whip): Lightens the pudding for that melt-in-your-mouth sensation.
- Butterfinger Candy Bars: The star ingredient, providing crunchy peanut butter and chocolate chunks to top the cake.
- Milk or Cream: Needed to prepare the pudding and keep the consistency just right.
- Butter and Sugar (optional): For extra richness if you want to enhance the cake base or topping.
Variations for Butterfinger Candy Bar Poke Cake
This Butterfinger Candy Bar Poke Cake is incredibly adaptable — feel free to personalize it to best suit your preferences, dietary needs, or available ingredients.
- Peanut Butter Lovers: Add a peanut butter drizzle over the top for even more nutty goodness.
- Chocolate Explosion: Use chocolate pudding and cocoa powder in the cake mix for richer chocolate flavor.
- Nut-Free Option: Swap Butterfinger bars with crushed chocolate chip cookies or toffee bits for crunch without nuts.
- Gluten-Free Version: Use a gluten-free cake mix and ensure pudding mix is gluten-free to accommodate sensitivities.
- Caramel Add-In: Drizzle caramel sauce between layers or on top for an extra decadent touch.

How to Make Butterfinger Candy Bar Poke Cake
Step 1: Bake the Cake
Prepare your cake mix as directed on the box and bake it in a 9×13-inch pan. Once baked, let it cool slightly to handle.
Step 2: Poke Holes in the Cake
Using the handle of a wooden spoon or a skewer, poke holes evenly across the surface of the warm cake. These will allow the filling to seep into every bite.
Step 3: Prepare the Filling
Mix instant pudding with cold milk until thickened; then add sweetened condensed milk for richness. Fold in whipped topping until the mixture is smooth and creamy.
Step 4: Pour Filling Over Cake
Slowly pour or spoon the creamy filling over the cake, making sure it sinks into the poke holes and covers the entire top for maximum flavor infusion.
Step 5: Chill and Apply Toppings
Refrigerate the cake for at least two hours to let the filling set perfectly. Before serving, generously sprinkle the chopped Butterfinger candy bars over the cake for a crunchy finish.
Pro Tips for Making Butterfinger Candy Bar Poke Cake
- Choose Fresh Candy Bars: Use fresh Butterfinger bars for the best crunch and flavor impact.
- Don’t Skip Chilling: Chilling allows flavors to meld and filling to set for a moist, cohesive dessert.
- Even Poking: Space holes regularly so the filling spreads evenly through the cake layers.
- Fold Gently: When mixing the whipped topping into the pudding, fold carefully to keep it light and fluffy.
- Customize Sweetness: Taste the filling before pouring and adjust sugar if you want it sweeter or more mellow.
How to Serve Butterfinger Candy Bar Poke Cake
Garnishes
Top the cake with additional chopped Butterfinger pieces or other candy bars, and consider a light dusting of powdered sugar or a drizzle of chocolate ganache for a stunning finish.
Side Dishes
Pair with a scoop of vanilla or chocolate ice cream, a small bowl of fresh berries, or a cold glass of milk to balance the richness of the cake.
Creative Ways to Present
Serve it in a clear glass trifle dish for colorful layered visibility, or slice into individual portions with a dollop of whipped cream and a mini Butterfinger bar on top for extra flair.
Make Ahead and Storage
Storing Leftovers
Keep leftover Butterfinger Candy Bar Poke Cake covered in the fridge for up to 4 days to maintain freshness and moistness.
Freezing
You can freeze the cake by wrapping it tightly in plastic wrap and foil, then placing in the freezer for up to 2 months. Thaw overnight in the refrigerator before serving.
Reheating
This dessert is best enjoyed chilled, so reheating is not recommended. Instead, let leftovers come to room temperature or eat them straight from the fridge for the perfect experience.
FAQs
Can I use homemade cake instead of box mix?
Absolutely! A homemade chocolate or vanilla sponge works wonderfully if you prefer baking from scratch.
What if I don’t have Butterfinger bars?
This recipe shines best with Butterfinger candy bars, but you can substitute with any crunchy peanut butter candy or toffee bits.
Can I make this dairy-free?
Yes! Use dairy-free pudding, whipped topping alternatives, and substitute sweetened condensed milk with coconut milk-based versions.
How long does it take to make?
From start to finish, including baking and chilling, it typically takes around 3 to 4 hours, mostly hands-off chilling time.
Is this cake suitable for kids’ birthdays?
Definitely! Kids love the sweet, creamy flavors and crispy candy pieces, making it a perfect birthday party favorite.
Final Thoughts
The Butterfinger Candy Bar Poke Cake is a joyous blend of textures and flavors that’s sure to satisfy any candy lover’s dream. With simple ingredients, easy steps, and plenty of room for creative twists, this cake will quickly become your go-to dessert for celebrations or just because. Gather your ingredients and dig in—your new favorite cake awaits!
Related Posts
Print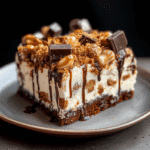
Butterfinger Candy Bar Poke Cake
- Total Time: 3 hours 30 minutes (including chilling)
- Yield: 12 servings 1x
- Diet: Can be made Gluten Free with appropriate mixes
Description
The Butterfinger Candy Bar Poke Cake is a delightful layered dessert featuring a moist cake base infused with a creamy pudding and sweetened condensed milk filling, topped generously with crunchy chopped Butterfinger candy bars. Its combination of textures—soft cake and crunchy candy—makes it an irresistible treat perfect for parties, birthdays, or anytime you crave a sweet, nostalgic indulgence.
Ingredients
For the Cake Base
- 1 box chocolate or vanilla cake mix (plus ingredients needed according to box instructions)
For the Filling
- 1 package instant pudding mix (vanilla or chocolate)
- 2 cups cold milk
- 1 can (14 oz) sweetened condensed milk
- 1 tub (8 oz) whipped topping (Cool Whip), thawed
Toppings
- 4–5 Butterfinger candy bars, chopped
Optional Ingredients
- Butter and sugar (for extra richness in cake base or topping)
- Peanut butter (for drizzle)
- Caramel sauce (for drizzling)
Instructions
- Bake the Cake: Prepare your boxed cake mix according to package instructions. Pour the batter into a greased 9×13-inch baking pan and bake as directed. Once done, allow the cake to cool slightly until it is warm but manageable.
- Poke Holes in the Cake: Using the handle of a wooden spoon or a skewer, poke holes evenly spaced across the entire surface of the warm cake. These holes will let the filling seep into every bite, enhancing moisture and flavor.
- Prepare the Filling: In a mixing bowl, whisk the instant pudding mix with 2 cups of cold milk until thickened. Stir in the sweetened condensed milk until fully combined. Gently fold in the thawed whipped topping, mixing carefully to maintain a light, fluffy texture.
- Pour Filling Over Cake: Slowly pour or spoon the creamy pudding mixture evenly over the cake, ensuring it seeps into all the poke holes and covers the surface completely for maximum flavor absorption.
- Chill and Apply Toppings: Cover the cake with plastic wrap and refrigerate for at least 2 hours to allow the filling to set. Before serving, sprinkle generously with chopped Butterfinger candy bars to add a crunchy finish.
Notes
- Use fresh Butterfinger bars for the best flavor and crunch.
- Chilling the cake is essential to let the filling set and flavors meld.
- Space the holes evenly to ensure the filling distributes well throughout the cake.
- Fold whipped topping gently into the pudding to keep the mixture light and fluffy.
- Taste the filling before pouring and adjust sweetness to your preference if needed.
- Prep Time: 20 minutes
- Cook Time: 30–35 minutes
- Category: Dessert
- Method: Baking
- Cuisine: American
Nutrition
- Serving Size: 1 slice (1/12th of cake)
- Calories: 420
- Sugar: 38g
- Sodium: 220mg
- Fat: 20g
- Saturated Fat: 9g
- Unsaturated Fat: 8g
- Trans Fat: 0.5g
- Carbohydrates: 55g
- Fiber: 1g
- Protein: 5g
- Cholesterol: 40mg