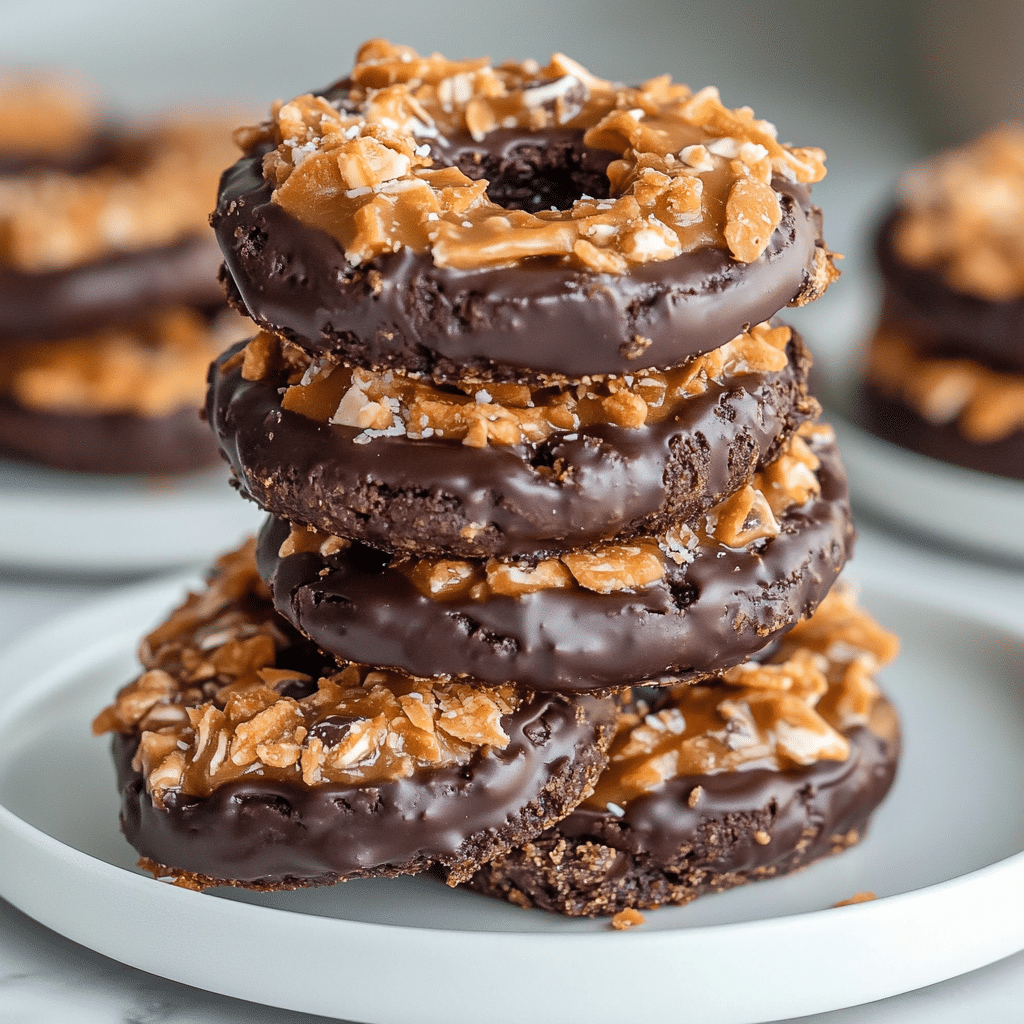
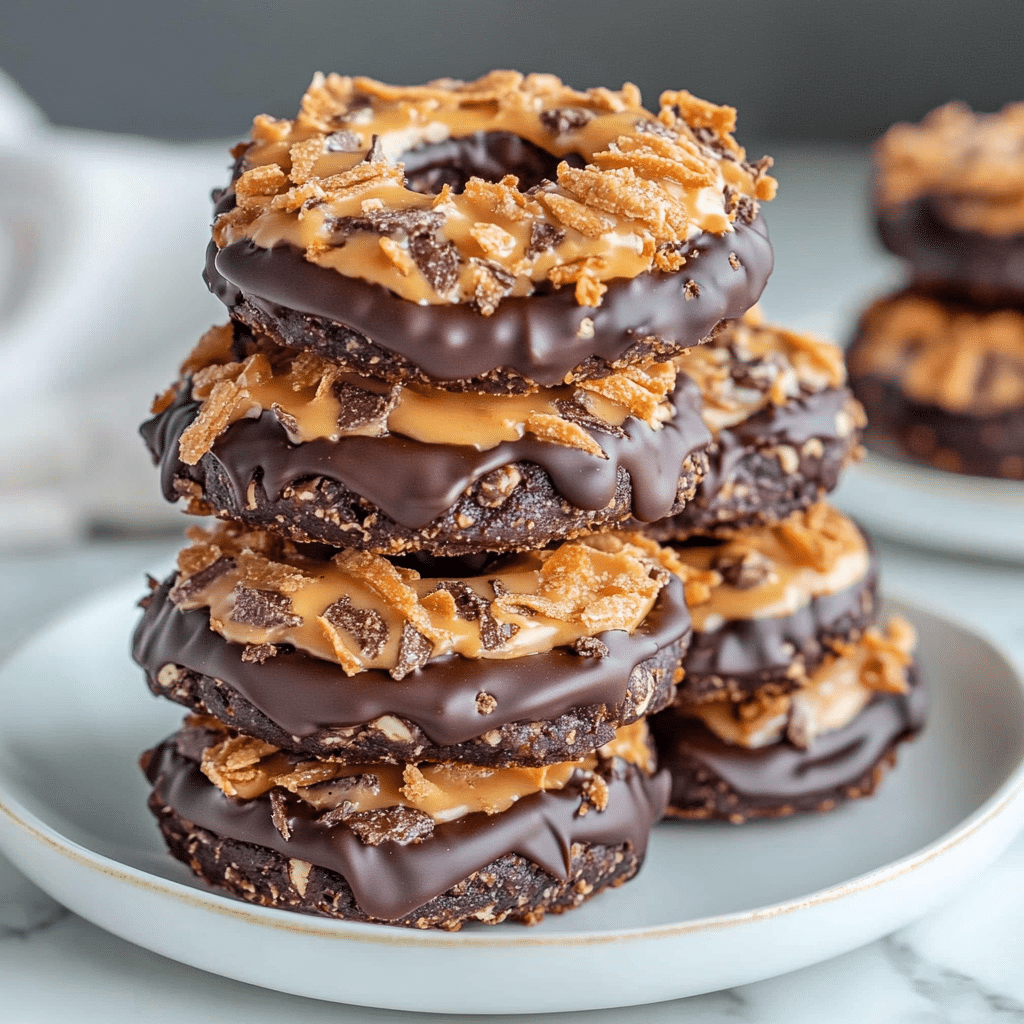
If you’ve ever craved the delicious combination of coconut, caramel, and chocolate found in Samoas Girl Scout Cookies, you’re in for a treat. These homemade versions are just as decadent and much easier to make than you might think. Whether you’re reminiscing about the good old days of Girl Scout cookie season or simply want to enjoy a batch of these sweet cookies all year round, this recipe will deliver that nostalgic, irresistible taste.
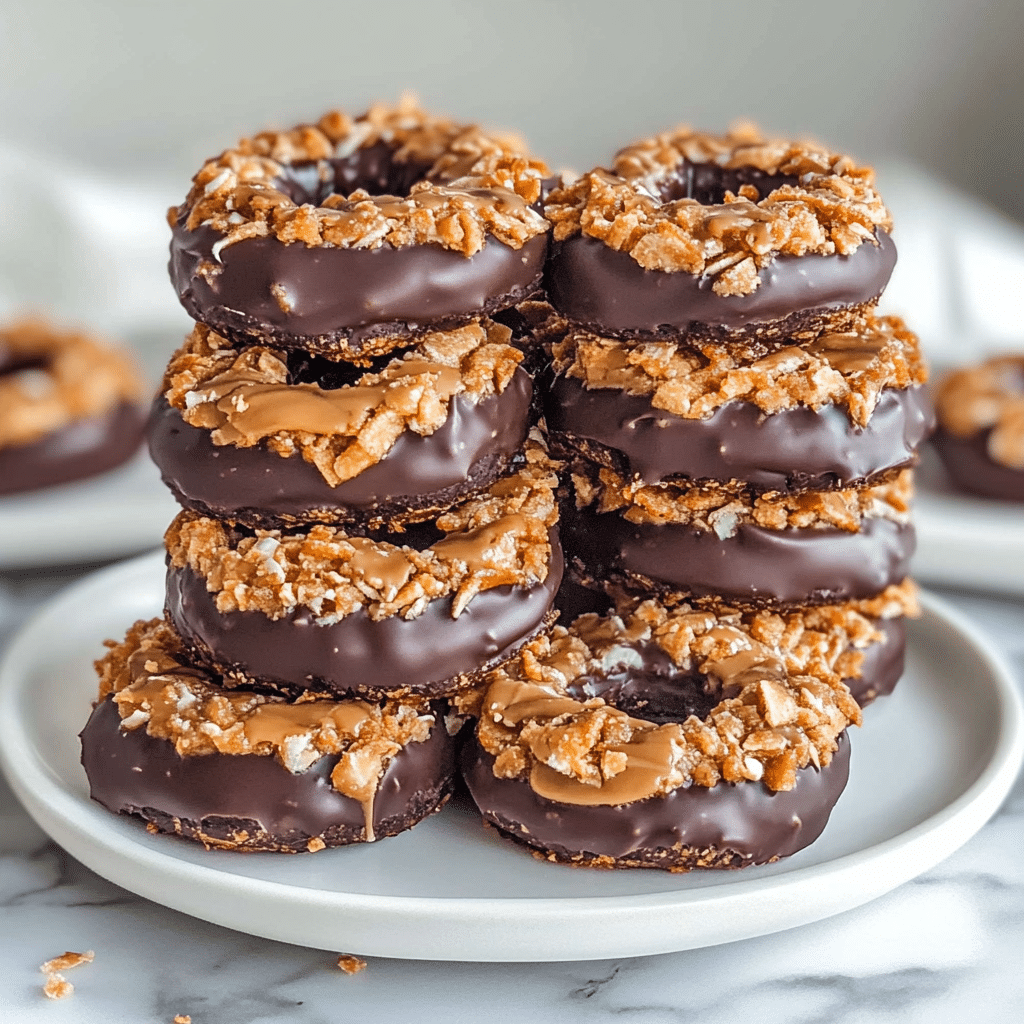
Samoas are known for their perfect balance of flavors – a buttery, crispy cookie base topped with chewy caramel, toasted coconut, and finished with a drizzle of dark chocolate. When made from scratch, they are fresh, chewy, and indulgent. With this simple recipe, you can recreate those iconic Girl Scout cookies right in your kitchen and enjoy them whenever you like.
Why You’ll Love This Recipe
- True Samoas Flavor – This recipe captures the authentic taste of the beloved Girl Scout Samoas with its perfect balance of crispy cookie, chewy caramel, toasted coconut, and rich chocolate.
- Fresh and Homemade – Making these cookies at home means you get to enjoy them fresh, with no preservatives or artificial flavors.
- Customizable – You can adjust the amount of chocolate or caramel depending on how rich and indulgent you like your cookies.
- Perfect for Any Occasion – Whether you’re hosting a party, celebrating a special occasion, or just treating yourself, these cookies are always a hit.
- Satisfying and Delicious – The crispy, buttery base paired with sweet caramel and coconut makes these cookies truly irresistible. Once you start, it’s hard to stop!
Disclosure: This post contains affiliate links.If you click and make a purchase, I may earn a small commission at no extra cost to you.

Ingredients
For the Cookies
- All-purpose flour
- Baking powder
- Salt
- Unsalted butter (softened at room temperature)
- Granulated sugar
- Vanilla extract
- Half and half
For the Topping
- Shredded sweetened coconut flakes
- Caramels
- Evaporated milk
- Dark chocolate melting wafers
- Vegetable oil or shortening
Variations
- Coconut Substitutes: If you’re not a fan of shredded coconut, try using toasted oats or finely chopped nuts for a different texture and flavor.
- Darker Chocolate: For a richer taste, use semi-sweet or bittersweet chocolate instead of dark chocolate wafers.
- Vegan Option: Substitute the butter with a vegan butter alternative and use dairy-free caramels to make these cookies vegan-friendly.
- Caramel Sauce: Instead of melting caramels, you can use homemade caramel sauce or store-bought if you prefer a smoother, more drizzled topping.
How to Make the Recipe
Step 1: Make the Cookie Dough
Preheat your oven to 350°F (175°C). In a medium bowl, whisk together the all-purpose flour, baking powder, and salt. In a separate large bowl, cream together the softened butter and granulated sugar until light and fluffy. Add the vanilla extract and half and half, mixing well. Gradually add the dry ingredients into the wet ingredients, mixing until a dough forms.
Step 2: Roll Out and Cut the Dough
On a lightly floured surface, roll out the dough to about 1/4-inch thickness. Use a round cookie cutter to cut out circles, and then use a smaller round cutter or a knife to remove the center of each circle, creating a ring shape. If you don’t have a cutter, you can also use the rim of a glass for the outer circle and a bottle cap for the center.
Step 3: Bake the Cookies
Place the cookies on a baking sheet lined with parchment paper. Bake for 10-12 minutes, or until the edges of the cookies are lightly golden. Allow the cookies to cool on the baking sheet for a few minutes before transferring them to a wire rack to cool completely.
Step 4: Prepare the Topping
While the cookies are cooling, toast the shredded coconut. Spread the coconut in an even layer on a baking sheet and toast in the oven at 350°F (175°C) for 5-7 minutes, stirring occasionally, until golden brown and fragrant. Set the toasted coconut aside.
In a medium saucepan, melt the caramels with the evaporated milk over medium-low heat, stirring occasionally until smooth. Once the cookies are fully cooled, spread a layer of caramel on top of each cookie, pressing gently to make it stick. Then, sprinkle the toasted coconut on top of the caramel layer, pressing lightly to adhere.
Step 5: Dip in Chocolate
Melt the dark chocolate wafers in a heatproof bowl over a pot of simmering water or in the microwave in 30-second intervals. Stir in the vegetable oil or shortening until the chocolate is smooth and glossy. Dip the bottoms of the cookies into the melted chocolate, ensuring the caramel and coconut stay intact. Place the dipped cookies on a parchment-lined baking sheet.
Step 6: Drizzle the Cookies
Once all the cookies are dipped, drizzle the remaining chocolate over the tops for that signature Samoa look. Let the chocolate harden at room temperature or speed up the process by placing the cookies in the refrigerator for about 15-20 minutes.

Tips for Making the Recipe
- Make sure your butter is softened to room temperature before starting the dough to ensure smooth and even mixing.
- Toast the coconut carefully, as it can burn quickly. Keep an eye on it while it’s in the oven.
- If the dough becomes too soft while rolling, chill it for about 30 minutes before continuing to make it easier to handle.
- For a more uniform chocolate coating, use a dipping fork or skewer to dip the cookies and gently shake off excess chocolate before placing them on the baking sheet.
How to Serve
- Serve these cookies as a treat with a cup of coffee or tea for a delightful snack.
- They make a perfect gift during the holiday season, boxed up in a cute container with a ribbon.
- These cookies are also a great addition to dessert platters for parties, potlucks, or bake sales.
Make Ahead and Storage
Storing Leftovers
Store your homemade Samoas in an airtight container at room temperature for up to 1 week. For longer shelf life, refrigerate them, where they will stay fresh for up to 2 weeks. Allow the cookies to come to room temperature before serving.
Freezing
These cookies freeze well. You can freeze the cookies before or after dipping them in chocolate. Just make sure to wrap them tightly in plastic wrap and store them in a freezer-safe container for up to 3 months. When ready to enjoy, thaw them in the refrigerator overnight and let them come to room temperature.
Reheating
If you prefer to enjoy them warm, place the cookies in the microwave for 10-15 seconds. Be cautious not to overheat the chocolate.
FAQs
1. Can I use milk chocolate instead of dark chocolate?
Yes, you can use milk chocolate if you prefer a sweeter taste, but it will change the flavor balance of the cookies slightly.
2. Can I make the cookies thinner?
Yes, you can roll the dough thinner, but make sure to adjust the baking time as thinner cookies will cook faster.
3. Can I use sweetened condensed milk instead of evaporated milk?
Evaporated milk is recommended in this recipe for its consistency, but sweetened condensed milk will make the caramel sweeter and thicker, so use it only if you prefer a sweeter filling.
4. How can I make the caramel smoother?
If the caramel seems too thick, you can add a bit more evaporated milk to loosen it up and make it easier to spread on the cookies.
5. How do I keep the coconut from falling off the cookies?
Make sure to press the toasted coconut into the caramel layer gently so that it sticks better to the caramel. You can also use a little more caramel to help it adhere.
6. Can I use other types of nuts instead of coconut?
Yes, you can experiment with chopped nuts such as almonds or pecans if you prefer a nutty version of these cookies.
7. Can I make these cookies gluten-free?
Yes, you can substitute the all-purpose flour with a gluten-free flour blend. Make sure the other ingredients (like caramels) are also gluten-free.
8. How do I prevent the chocolate from hardening too quickly?
If the chocolate hardens too quickly during dipping, try adding a little more vegetable oil or shortening to make it smoother and easier to work with.
9. Can I skip the chocolate drizzle?
Yes, you can skip the drizzle, but it’s part of what makes these cookies visually appealing and adds extra chocolate flavor.
10. Can I make the caramel from scratch?
Yes, you can make your own caramel by melting sugar, butter, and cream together. However, the store-bought caramels are much easier and quicker for this recipe.
Conclusion
Homemade Samoas Girl Scout Cookies are the perfect treat for anyone who loves the classic combination of coconut, caramel, and chocolate. With a buttery, crisp base and a decadent topping, these cookies are sure to impress. Whether you’re making them for a special occasion or just to enjoy a sweet treat at home, this recipe brings the iconic Girl Scout flavor to your kitchen. Easy to make and incredibly satisfying, these cookies will quickly become a favorite in your baking repertoire!
Print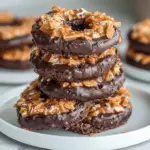
Homemade Samoas Girl Scout Cookies
- Total Time: 35 minutes
- Yield: 24 cookies 1x
- Diet: Vegetarian
Description
Samoas are the iconic Girl Scout cookie, featuring a buttery shortbread base, a chewy coconut and caramel topping, and a delicious drizzle of dark chocolate. Now, you can make these decadent treats from scratch at home! Perfect for cookie lovers, this recipe lets you recreate the beloved Samoas cookies without the hassle of waiting for cookie season.
Ingredients
For the Cookies
-
2 cups all-purpose flour
-
¼ tsp baking powder
-
1 tsp salt
-
2 sticks unsalted butter, softened at room temperature
-
½ cup granulated sugar
-
½ tsp vanilla extract
-
2 tbsp half-and-half
For the Topping
-
1 (14 oz) bag shredded sweetened coconut flakes
-
3 (10 oz) bags caramels
-
½ cup evaporated milk
-
1 cup dark chocolate melting wafers
-
1 tbsp vegetable oil or shortening
Instructions
-
Preheat the Oven: Preheat your oven to 350°F (175°C). Line a baking sheet with parchment paper or a silicone mat.
-
Make the Cookie Dough: In a medium bowl, whisk together the flour, baking powder, and salt. In a separate bowl, beat together the softened butter and sugar until creamy and smooth. Add the vanilla extract and half-and-half, mixing until combined. Gradually add the dry ingredients into the wet ingredients, mixing until a dough forms.
-
Shape the Cookies: Divide the dough into 24 small portions. Roll each portion into a ball, then flatten with your fingers or a glass to form a round cookie. Use a small round cutter or the handle of a spoon to make a hole in the center of each cookie, forming a ring.
-
Bake the Cookies: Place the cookies on the prepared baking sheet and bake for 10–12 minutes, or until the edges are lightly golden. Let the cookies cool completely on a wire rack.
-
Prepare the Topping: In a large saucepan over low heat, melt the caramels with the evaporated milk, stirring occasionally until smooth. While the caramels melt, toast the shredded coconut in a dry skillet over medium heat for 5–7 minutes, stirring frequently, until golden and fragrant.
-
Assemble the Cookies: Once the cookies have cooled, spread a thin layer of the caramel mixture on top of each cookie, followed by a generous amount of toasted coconut. Press the coconut down gently to ensure it sticks.
-
Chocolate Drizzle: In a microwave-safe bowl, melt the dark chocolate wafers with the vegetable oil or shortening, stirring until smooth. Drizzle the melted chocolate over the tops of the cookies or dip the bottoms of the cookies into the chocolate.
- Cool and Set: Let the cookies sit at room temperature until the chocolate has set, about 30 minutes. Store in an airtight container at room temperature.
Notes
-
For the best texture, ensure the caramel mixture is smooth and not too thick. If needed, add a little extra evaporated milk to loosen it.
-
You can freeze these cookies for up to 3 months. Just ensure the chocolate is completely set before storing them in a freezer-safe container.
- If you prefer, you can substitute semi-sweet or milk chocolate for the dark chocolate.
- Prep Time: 20 minutes
- Cook Time: 15 minutes
- Category: Dessert
- Method: Baking
- Cuisine: American