
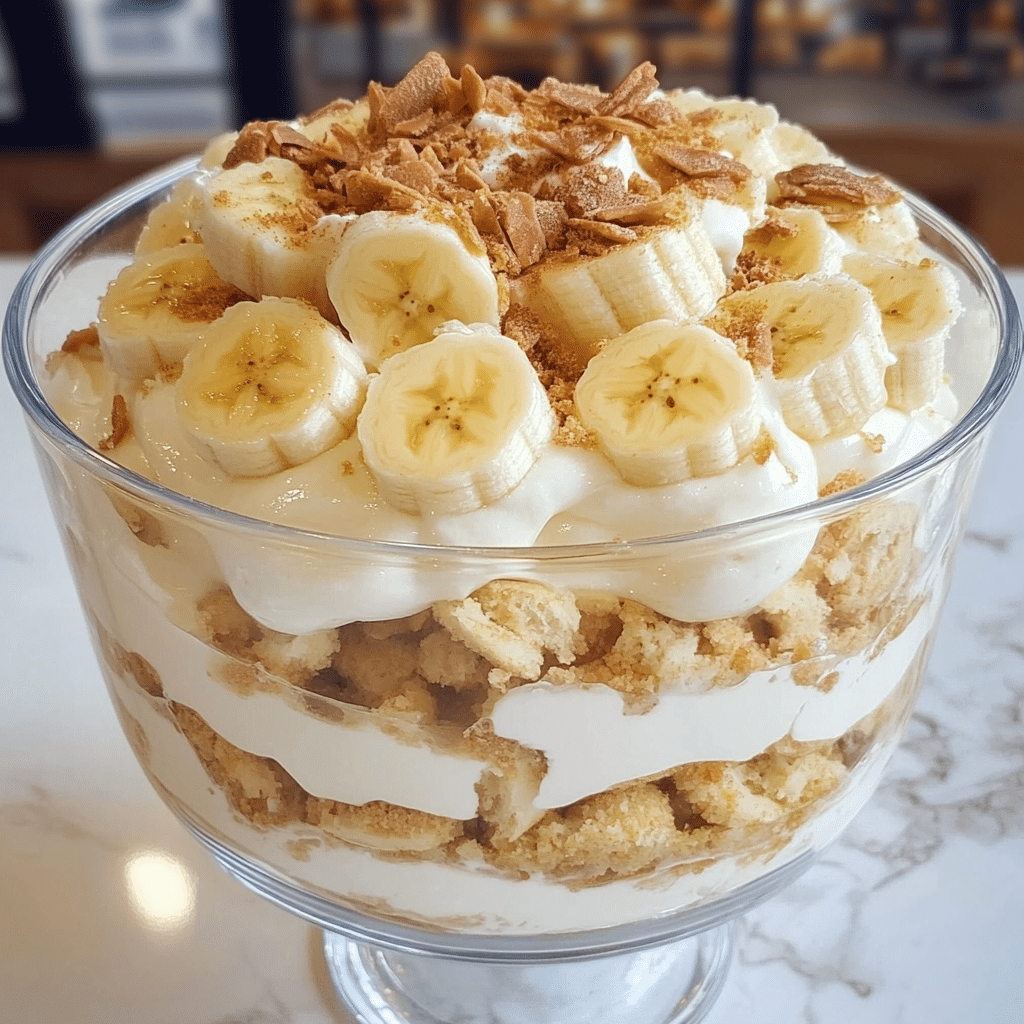
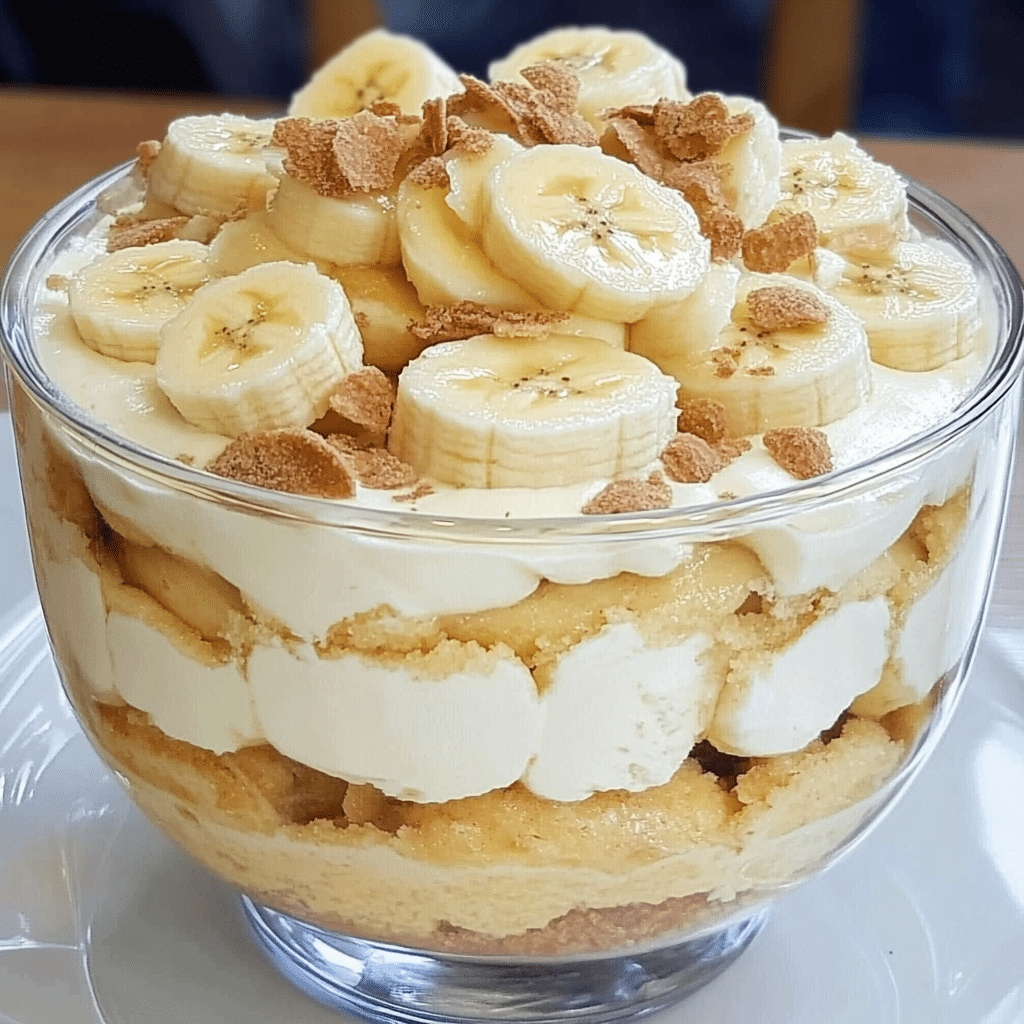
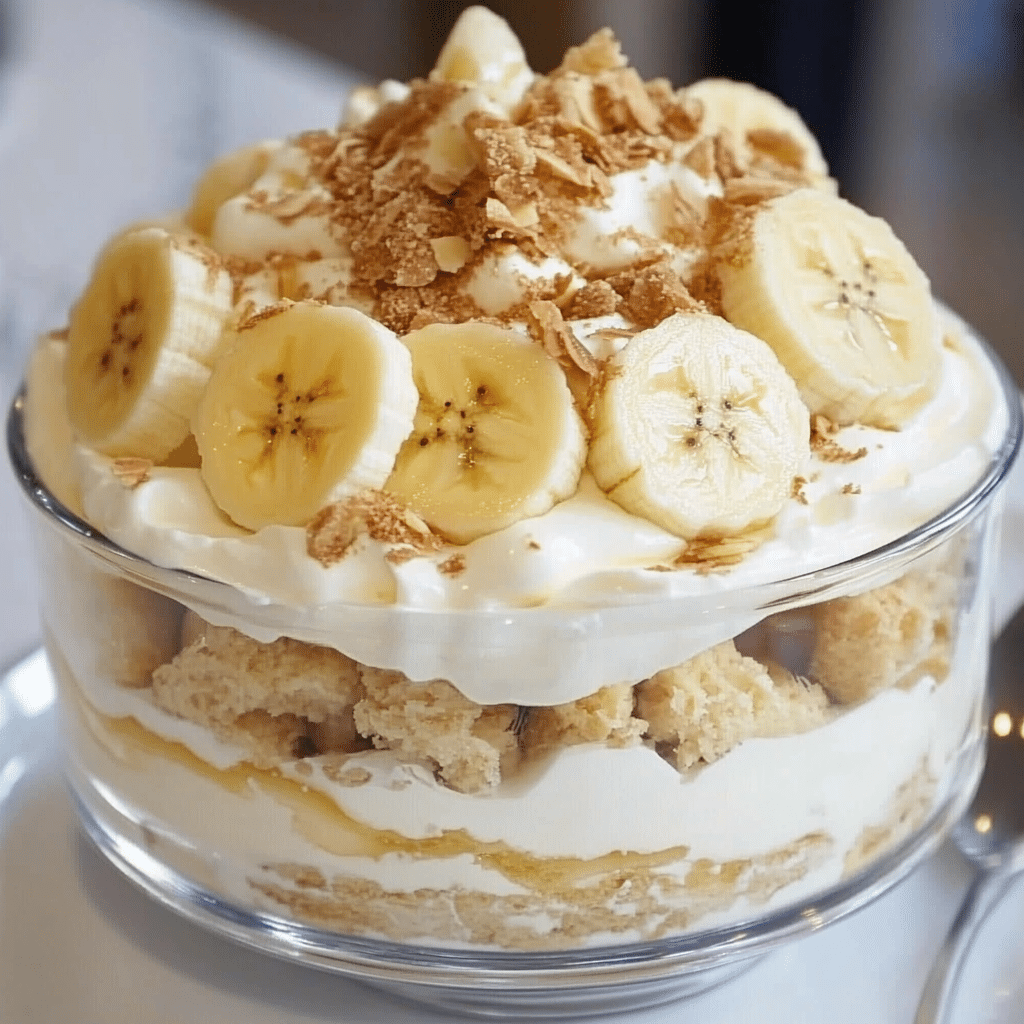
Magnolia Bakery’s famous banana pudding is a dessert that’s beloved by many and for good reason. It combines layers of creamy vanilla pudding, fresh bananas, and crunchy vanilla wafers, all topped off with a fluffy whipped cream. This decadent dessert is not only visually appealing but incredibly indulgent, making it perfect for gatherings, holidays, or just as a comforting treat.
The smooth and rich pudding is paired with the sweet, soft bananas, and the crunch of the vanilla wafers creates an irresistible texture. Whether you’re an experienced baker or someone who prefers easy-to-make recipes, this banana pudding is quick to assemble and requires no baking, making it a go-to dessert that’s always a crowd-pleaser.
Why You’ll Love This Recipe
Magnolia Bakery’s banana pudding has become iconic for its perfect balance of flavors and textures. The sweet and creamy pudding, the freshness of the bananas, and the crunch of vanilla wafers create a delightful contrast that appeals to both children and adults. It’s an easy-to-make dessert that can be prepared in advance, making it a great choice for parties, barbecues, or casual weeknight indulgence. Once you taste it, you’ll see why it’s a staple at the famous bakery and why it’s so loved by dessert enthusiasts everywhere.
Disclosure: This post contains affiliate links.If you click and make a purchase, I may earn a small commission at no extra cost to you.

Ingredients
- 1 can (14 oz) sweetened condensed milk
- 1 ½ cups ice cold water
- 1 package (3.4 oz) instant vanilla pudding mix (Jell-O brand is recommended)
- 3 cups heavy cream
- 1 box (11 oz) vanilla wafers (Nabisco Nilla Wafers are recommended)
- 5 ripe bananas, sliced
Variations
- Chocolate Banana Pudding: Add a layer of chocolate pudding mix alongside the vanilla pudding mix for a richer, double-flavored pudding.
- Coconut Banana Pudding: Add shredded coconut to the layers or mix some into the whipped cream for a tropical twist.
- Peanut Butter Banana Pudding: Layer peanut butter cups or a dollop of peanut butter into the pudding for a nutty flavor that pairs perfectly with the bananas.
How to Make the Recipe
Step 1: Prepare the Pudding
In a large mixing bowl, whisk together the sweetened condensed milk, ice cold water, and instant vanilla pudding mix. Whisk until the mixture thickens, about 2 minutes. Set the pudding aside to firm up.
Step 2: Whip the Cream
In a separate mixing bowl, beat the heavy cream with an electric mixer on medium-high speed until stiff peaks form. This will take about 3-4 minutes. Be careful not to over-beat.
Step 3: Combine Pudding and Whipped Cream
Once the pudding has set, gently fold the whipped cream into the pudding mixture. This will create a light and creamy filling for the banana pudding.
Step 4: Layer the Dessert
In a 9×13-inch dish, spread a thin layer of the pudding mixture on the bottom. Then, layer vanilla wafers, followed by a layer of sliced bananas. Repeat this process, creating layers of pudding, wafers, and bananas, until you run out of ingredients. Finish with a generous layer of the pudding mixture on top.
Step 5: Chill and Serve
Cover the banana pudding with plastic wrap and refrigerate for at least 4 hours, or overnight if possible. This allows the flavors to meld together and the wafers to soften, giving the pudding its signature texture.
Tips for Making the Recipe
- Use ripe bananas: Choose bananas that are ripe but not overly ripe. Overripe bananas can become mushy when layered.
- Chill before serving: For best results, allow the banana pudding to chill for several hours or overnight to enhance the flavors and let the wafers absorb some of the pudding.
- Don’t skip the whipped cream: The whipped cream is key to giving the pudding a light, airy texture that perfectly balances the richness of the pudding and bananas.
- Layer carefully: To create a beautiful presentation, arrange the bananas and wafers in neat layers before topping with the pudding mixture.
How to Serve
Serve Magnolia Bakery’s banana pudding chilled, straight from the refrigerator. For an extra touch, garnish the top with a few whole Nilla wafers or banana slices. This dessert can be served in individual cups for a more elegant presentation or in a large dish for easy serving at a party or gathering.
Make Ahead and Storage
Storing Leftovers
Store any leftover banana pudding in an airtight container in the refrigerator for up to 2-3 days. The flavor only improves with time as it allows the pudding to soak into the wafers and bananas.
Freezing
Banana pudding doesn’t freeze well due to the texture of the bananas. It’s best enjoyed fresh or within a few days of preparation.
Reheating
Banana pudding is best served cold, so there’s no need to reheat it. If you’ve stored it in the fridge, simply remove it and allow it to sit at room temperature for a few minutes before serving for a smoother texture.
FAQs
1. Can I use a different brand of vanilla wafers?
Yes, you can use other brands of vanilla wafers if needed, but Nabisco Nilla Wafers are recommended for the classic flavor and texture.
2. Can I make this banana pudding dairy-free?
Yes, you can use dairy-free substitutes such as coconut milk or almond milk for the pudding and a dairy-free whipped cream alternative.
3. How do I prevent the bananas from browning?
To keep the bananas from turning brown, you can drizzle them with a small amount of lemon juice or use a commercial product that prevents browning, though it’s not necessary for the flavor.
4. Can I use homemade pudding instead of instant pudding mix?
Yes, you can use homemade vanilla pudding in place of the instant mix, but it will require additional preparation time.
5. Can I add other fruits to the pudding?
Absolutely! Strawberries or blueberries would pair beautifully with the banana layers for a colorful and flavorful twist.
6. How long can I store the banana pudding?
The banana pudding can be stored in the refrigerator for up to 3 days. However, it’s best eaten within 2 days for optimal freshness.
7. Can I freeze the pudding?
It’s not recommended to freeze banana pudding due to the texture changes in the bananas and whipped cream once frozen and thawed.
8. Can I use light whipped cream or reduced-fat pudding?
You can use light versions of whipped cream and pudding mix, but the dessert may not be as rich and creamy as the original recipe.
9. Is there a way to make this dessert healthier?
You could use low-fat or sugar-free versions of the pudding mix, whipped cream, and sweetened condensed milk for a lighter version of the dessert, though it may affect the texture and flavor slightly.
10. Can I make individual servings?
Yes, you can layer the banana pudding in individual cups for a fun, portion-controlled presentation.
Conclusion
Magnolia Bakery’s Famous Banana Pudding is a classic dessert that never goes out of style. With its creamy, dreamy texture, fresh bananas, and crunchy vanilla wafers, it’s a dessert that will be the highlight of any gathering. Simple to prepare and incredibly satisfying, this recipe is sure to become a favorite in your dessert repertoire. Enjoy this sweet and comforting treat with family and friends, and prepare for it to disappear quickly!
Print
Magnolia Bakery’s Famous Banana Pudding Recipe
- Total Time: 4 hours (including chilling)
- Yield: 8 servings 1x
- Diet: Vegetarian
Description
Magnolia Bakery’s Famous Banana Pudding is a classic dessert that combines creamy, velvety pudding with the perfect balance of bananas and vanilla wafers. Known for its indulgent layers, this recipe will be a hit at any gathering, offering a rich and nostalgic treat. Whether you’re serving it at a family dinner or a celebration, this banana pudding is sure to impress.
Ingredients
-
1 (14 oz) can sweetened condensed milk
-
1 ½ cups ice cold water
-
1 (3.4 oz) package instant vanilla pudding mix (Jell-O brand recommended)
-
3 cups heavy cream
-
1 (11 oz) box vanilla wafers (Nabisco Nilla Wafers recommended)
-
5 ripe bananas, sliced
Instructions
-
Prepare the Pudding:
-
In a large bowl, whisk together the sweetened condensed milk, ice cold water, and instant vanilla pudding mix. Continue whisking for 2 minutes or until the pudding thickens. Set the pudding aside to firm up while you prepare the whipped cream.
-
-
Whip the Cream:
-
In a separate bowl, beat the heavy cream with an electric mixer on high speed until soft peaks form. This will take about 3-5 minutes.
-
-
Combine Pudding and Whipped Cream:
-
Gently fold the whipped cream into the prepared pudding mixture, being careful not to deflate the whipped cream. Mix until well combined and smooth.
-
-
Assemble the Banana Pudding:
-
In a large trifle dish or individual serving cups, layer the ingredients. Start by spreading a thin layer of the pudding mixture on the bottom of the dish. Then, arrange a layer of vanilla wafers, followed by a layer of sliced bananas. Repeat the layers, finishing with a layer of the pudding mixture on top.
-
-
Chill the Pudding:
-
Cover the dish with plastic wrap and refrigerate for at least 4 hours, or overnight. The longer it sits, the better the flavors meld together.
-
-
Serve:
-
Before serving, garnish with additional vanilla wafers and banana slices if desired. Serve chilled and enjoy!
-
Notes
-
Make Ahead: This dessert can be made a day ahead and stored in the refrigerator. The pudding gets even better as it sits.
-
Bananas: To prevent the bananas from browning too quickly, slice them just before layering them into the dessert.
- Whipped Cream: For an extra touch of sweetness, you can lightly sweeten the whipped cream with a little powdered sugar if you prefer.
- Prep Time: 10 minutes
- Cook Time: 0 minutes
- Category: Dessert
- Method: No-Bake
- Cuisine: American