
Soft, juicy chicken with a crisp cornflake coating and a tender center is exactly what makes these crispy cornflake chicken tenders so hard to stop eating. This high value recipe offers a delicious alternative to standard breading, providing a superior quality crunch that remains light and airy. From homemademenus.com, this dish is perfect for weeknight dinners or weekend gatherings.
Preparation takes about 30 minutes, with a quick 15-minute frying time that yields enough to feed a hungry family. I like to prepare these for game days because they hold their texture much better than traditional breadcrumbs. Carmen Maria Márquez suggests letting the seasoned chicken marinate to ensure every bite is packed with deep, savory flavor.
Whether you are cooking for kids or hosting a party, this recipe is a guaranteed crowd-pleaser that delivers bakery-style results in your own kitchen. Stick around to learn the expert techniques for achieving the ultimate golden-brown finish.
Why This Recipe Is a Keeper
What Makes It Special
The secret to this recipe lies in the structural integrity of the cornflake crust, which creates a jagged surface area for maximum crunch. Unlike flour-only coatings, the crushed flakes provide a premium quality texture that feels light while delivering a satisfying snap with every bite.
This method is also incredibly reliable for home cooks who want consistent results without the mess of complicated batters. By using a standard three-step dredging process, you ensure that the moisture is locked into the chicken while the exterior becomes a beautiful golden brown.
- Crispy texture: The crushed cornflakes provide a unique, long-lasting crunch.
- Quick method: These tenders cook in minutes, making them ideal for busy schedules.
- Bold flavor: A blend of seven different spices ensures a complex and savory profile.
- Great yield: This recipe makes a large batch, providing an investment in meal prep for the week.
Ingredients: What You’ll Need
Key Ingredients
To achieve the best results, ensure you use fresh chicken breast and high-quality spices to maintain the superior quality of the finished dish. Using exact measurements is crucial for balancing the seasoning across the flour and the meat itself.
Selecting premium options for your cooking oil, such as peanut or canola oil, will help you reach a high smoke point without burning the cornflake coating. This ensures the chicken cooks through perfectly while the outside remains bright and appetizing.
- 1.1 lbs chicken breast: Cut into even, thin strips for uniform cooking.
- 2 cups all-purpose flour: Creates the initial dry base for the egg wash to stick to.
- 2 cups crushed cornflakes: The primary source of the signature crunchy exterior.
- 2 large eggs: Acts as the binding agent for the breading process.
- 1/2 cup milk: Thins the eggs for a smoother, more even coating.
- 1 tsp garlic powder: Provides a pungent, savory base note to the seasoning.
- 1 tsp onion powder: Adds a subtle sweetness and depth to the crust.
- 1 tsp paprika: Offers a beautiful red hue and a mild, earthy spice.
- 1 tsp black pepper: Adds a sharp, classic heat to the chicken strips.
- 1 tsp salt: Essential for enhancing all the other herbal and spicy flavors.
- 1/2 tsp dried thyme: Introduces a floral, herbal element that cuts through the fried richness.
- 1/2 tsp chili powder: An optional addition for those who prefer a tiny bit of warmth.
- 1 tbsp seasoning powder: A versatile flavor booster for high value taste.
- 1 quart oil: Used for deep frying the tenders to golden perfection.
- 1 tbsp fresh parsley: Chopped finely for a bright and fresh garnish.
How to Make Crispy Cornflake Chicken Tenders
Step-by-Step Instructions
The process begins with a careful marination period, which is a luxury step that elevates the flavor from simple to professional. Giving the spices time to penetrate the meat ensures that the chicken is seasoned from the inside out, not just on the surface.
Consistency is key when dredging the chicken; you want to ensure no bare spots are left, as these will lead to uneven browning and potential moisture loss. Follow the order of flour, then egg, then flakes for a superior quality result every single time.

Disclosure: This post contains affiliate links.If you click and make a purchase, I may earn a small commission at no extra cost to you.

- Season: Toss the chicken strips with salt, paprika, garlic, onion powder, pepper, thyme, chili powder, and seasoning powder; marinate for 30 minutes.
- Set up stations: Place flour in bowl one, whisked eggs and milk in bowl two, and crushed cornflakes in bowl three.
- Coat: Dredge each strip in flour, dip into the egg mixture, then press firmly into the cornflakes until fully covered.
- Heat Oil: Fill a deep pan with oil and heat over medium until it reaches approximately 350 degrees Fahrenheit.
- Fry: Carefully add chicken strips in batches, frying until they are golden brown and reach an internal temperature of 165 degrees.
- Drain: Place the finished tenders on a wire rack or paper towels to remove excess oil and maintain crunch.
- Serve: Garnish with fresh parsley and serve immediately with your preferred dipping sauces.
My Best Tips
Pro Tips for Success
According to Carmen Maria Márquez, the biggest mistake people make is overcrowding the pan, which drops the oil temperature and leads to soggy breading. For expert results, fry only three or four strips at a time to keep the heat consistent.
Another high value tip involves the texture of the cornflakes; do not pulse them into a fine powder. You want various sizes of flakes to create a bakery-style craggy surface that traps air and creates more crunch.
- Double-dip: For an extra thick crust, repeat the egg and cornflake steps twice before frying.
- Oil temperature: Use a thermometer to ensure the oil stays between 325 and 350 degrees.
- Wire rack: Never stack hot chicken on a plate; the steam will ruin the bottom layer’s crispiness.
Easy Variations
Simple Twists and Swaps
If you want to add a premium pricing feel to this dish, consider mixing in some freshly grated Parmesan cheese with the cornflake crumbs. This adds a salty, nutty dimension that pairs beautifully with the poultry and spices.
For those who enjoy a bit more heat, you can substitute the chili powder for cayenne or add a few dashes of hot sauce directly into the egg and milk mixture. This ensures the spice is distributed evenly throughout the coating.
- Herb-Crusted: Add a tablespoon of dried rosemary and oregano for a Mediterranean flair.
- Sweet and Spicy: Drizzle the finished tenders with a mix of honey and sriracha.
Fixing Common Issues
Troubleshooting the Crunch
If your coating is falling off, it usually means the chicken was too wet before the flour stage or wasn’t pressed firmly enough into the flakes. Make sure to pat the chicken dry before seasoning and use firm pressure during the final breading step.
If the outside is burning before the inside is cooked, your oil is likely too hot. Lower the heat and allow the oil to cool slightly, or cut your chicken into thinner strips to ensure a faster cook time for the meat.
- Soggy coating: Ensure the oil is hot enough before adding the chicken; if it bubbles instantly, it is ready.
- Bland meat: Do not skip the 30-minute marination time; it is vital for deep flavor.
How to Serve
Serving Ideas and Pairings
These tenders are best served warm alongside a variety of dips like honey mustard, ranch, or a premium quality barbecue sauce. They make an excellent main course when paired with a fresh garden salad or classic coleslaw.
You can also use these tenders to create high-end sandwiches or wraps. Understanding the history of Chicken Tenders and the evolution of Corn flakes helps appreciate why this combination is a staple of American comfort food.
Storage and Reheating
Make Ahead and Leftovers
Storing these tenders correctly is an investment in future meals, as they make for a great protein addition to salads the next day. Keep them in an airtight container to prevent the breading from absorbing too much moisture from the fridge.
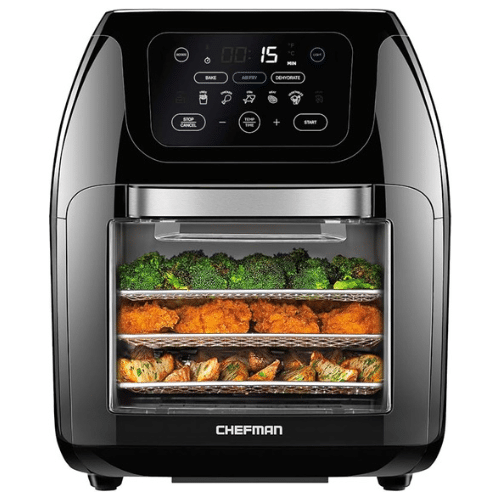
While they are a high value snack when cold, reheating them in an air fryer or oven is the best way to restore that original superior quality crunch. Avoid the microwave, as it will make the cornflakes soft and chewy.
- To Store: Keep in the refrigerator for up to 4 days in a sealed container.
- To Freeze: Flash freeze on a tray, then move to a bag for up to 3 months.
- To Reheat: Bake at 375 degrees for 10 minutes or air fry for 5 minutes at 350 degrees.
