
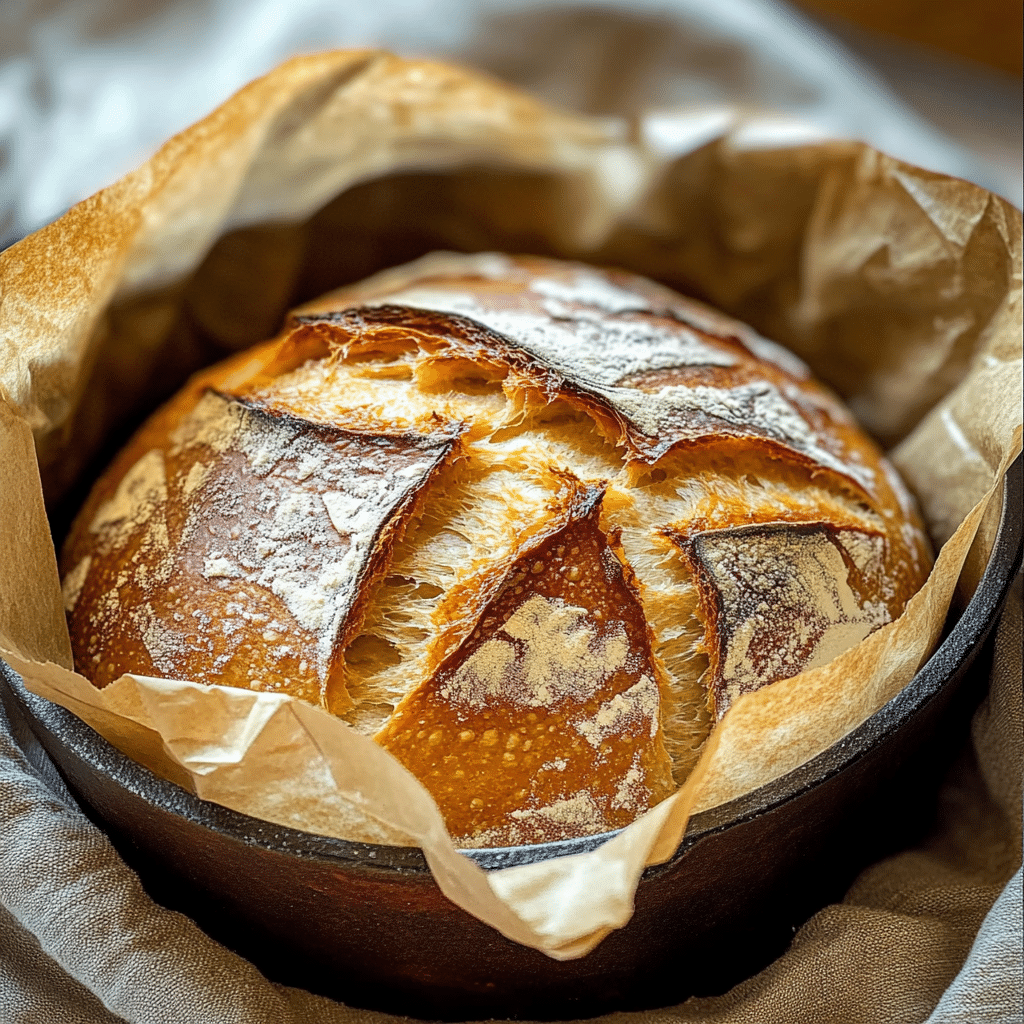
If you’ve ever wanted to bake a stunning loaf of bread with a deeply flavorful crust and a tender, airy crumb, learning how to make Dutch Oven Sourdough Bread is your ticket to success. This method uses the magic of a Dutch oven to trap steam, creating that crispy golden outside while maintaining a soft and chewy inside. Whether you’re new to sourdough or looking to perfect your technique, this guide will walk you through every step to create bakery-quality bread right in your kitchen.
Why You’ll Love This Recipe
- Effortless Steam Creation: The Dutch oven traps moisture perfectly, eliminating the need for complicated steaming methods.
- Deeply Crispy Crust: Achieve that trademark crackly crust sourdough is known for without extra gadgets.
- Flavor Development: Slow fermentation using natural starter enhances taste and digestibility.
- Minimal Ingredients: Simple pantry staples come together to create a complex and satisfying loaf.
- Perfect for Beginners: This technique is forgiving and adaptable, helping first-timers succeed with sourdough baking.
Ingredients You’ll Need
Every ingredient in Dutch Oven Sourdough Bread plays a vital role, from building structure to flavor and texture. The list is straightforward yet powerful, ensuring you get that perfect balance of chewy inside and crispy outside.
- Strong Bread Flour: Provides essential gluten for structure and a chewy crumb.
- Active Sourdough Starter: Your natural yeast source, responsible for fermentation and tangy flavor.
- Water: Hydrates the flour and controls dough consistency for an open crumb.
- Salt: Enhances flavor and regulates fermentation for an even rise.
Variations for Dutch Oven Sourdough Bread
One of the best things about Dutch Oven Sourdough Bread is how adaptable it can be. Feel free to give this classic recipe your own twist with these easy variations that cater to different tastes and dietary needs.
- Whole Wheat Boost: Swap half the bread flour for whole wheat to add nuttiness and extra fiber.
- Herb Infusion: Add rosemary, thyme, or garlic to the dough for an aromatic loaf perfect for savory pairings.
- Seeded Crunch: Mix in flax, sunflower, or sesame seeds to the dough or sprinkle on top for texture and nutrition.
- Gluten-Free Adaptation: Use a gluten-free sourdough starter and a custom flour blend to enjoy a safe version.
- Sweet Sourdough: Incorporate dried fruit or honey for a subtly sweet bread variation.

How to Make Dutch Oven Sourdough Bread
Step 1: Prepare Your Starter and Ingredients
Begin by feeding your sourdough starter 4-6 hours before baking so it’s bubbly and active. Meanwhile, measure your flour, water, and salt accurately, as these proportions are key to perfecting your bread.
Step 2: Mix and Autolyse
Combine the flour and water first, mixing just until there are no dry spots. Let this mixture rest for 30 to 45 minutes to improve hydration and gluten development before adding salt and starter.
Step 3: Incorporate Starter and Salt
Add your active starter and salt to the autolyzed dough and mix well. This final mixture forms your basic dough, ready for kneading and fermentation.
Step 4: Bulk Fermentation with Stretch and Folds
Allow the dough to ferment for 3 to 4 hours at room temperature, performing stretch and folds every 30 minutes for the first 2 hours to strengthen gluten and develop structure.
Step 5: Shape the Dough
Turn your dough out onto a lightly floured surface and shape it into a tight ball, creating surface tension. Place it seam-side up in a lightly floured banneton or bowl lined with a tea towel.
Step 6: Final Proof
Refrigerate the dough overnight or for 8-12 hours to develop flavor and improve dough strength. This cold proof also makes the dough easier to handle.
Step 7: Preheat Dutch Oven and Bake
Heat your Dutch oven in the oven at 500°F (260°C) for about 45 minutes. Carefully transfer the dough seam-side down into the hot pot, score the top with a sharp knife or lame, cover, and bake for 20 minutes.
Step 8: Finish Baking Uncovered
Remove the lid to let the crust develop its signature golden brown color and bake for an additional 25-30 minutes. Your Dutch Oven Sourdough Bread is ready when it sounds hollow tapping the bottom.
Pro Tips for Making Dutch Oven Sourdough Bread
- Use a Digital Scale: Accuracy in measuring ingredients makes a huge difference in bread consistency.
- Maintain Starter Health: Keep your sourdough starter active and feeding regularly for consistent rises.
- Don’t Skip Autolyse: Allowing flour and water to rest before mixing salt and starter improves dough extensibility.
- Use Parchment Paper: For easy transfer of dough into the hot Dutch oven without burns or sticking.
- Let It Cool: Allow the bread to cool completely before slicing to preserve crumb texture and flavor.
How to Serve Dutch Oven Sourdough Bread
Garnishes
Sprinkle flaky sea salt, brush with melted herb butter, or drizzle with olive oil to elevate the flavors right before serving.
Side Dishes
This bread pairs beautifully with soups, stews, cheese boards, and fresh salads, making it a versatile table companion.
Creative Ways to Present
Slice thick for warm sandwiches, hollow out to make a rustic bread bowl, or serve alongside homemade dips for a cozy, comforting meal.
Make Ahead and Storage
Storing Leftovers
Wrap your leftover Dutch Oven Sourdough Bread in a clean kitchen towel or paper bag and store at room temperature for up to 2 days to maintain crust crispness.
Freezing
Slice the bread and freeze in airtight bags for up to 3 months. This way, you can enjoy fresh-tasting slices anytime by toasting or thawing.
Reheating
To revive crustiness, warm slices in a toaster or whole loaves in the oven at 350°F (175°C) for 10-15 minutes before serving.
FAQs
What type of Dutch oven works best for sourdough bread?
A heavy cast iron Dutch oven with a tight-fitting lid is ideal, as it retains heat and moisture evenly, producing the best crust and crumb.
Can I use all-purpose flour instead of bread flour?
Yes, but bread flour is preferred for its higher protein content, which supports better gluten development and a chewier texture.
How do I know when my sourdough starter is ready to use?
Your starter should be bubbly, doubled in size, and pass the float test—meaning a small spoonful floats in water—indicating it’s active and ready.
Is it necessary to refrigerate the dough during fermentation?
Cold fermentation improves flavor and handling but isn’t mandatory; you can do a longer bulk ferment at room temperature instead.
How can I prevent my bread from sticking to the Dutch oven?
Use parchment paper underneath the dough before placing it in the hot Dutch oven, or lightly oil the pot before baking.
Final Thoughts
Mastering Dutch Oven Sourdough Bread opens a world of bread-baking joy, combining rustic charm with delightful textures and flavors. This simple yet rewarding recipe invites you to experience the art of sourdough with every warm, crunchy bite. So grab your ingredients, warm up that Dutch oven, and let’s create loaves to be proud of!