
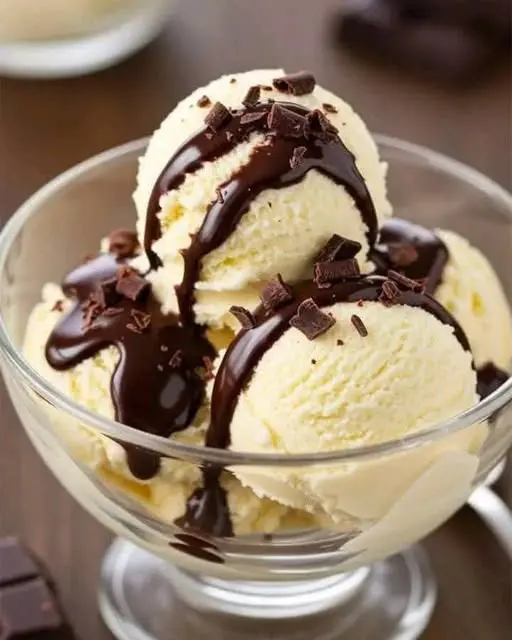
Soft, chewy custard with a crisp finish and creamy center is exactly what makes this homemade vanilla ice cream recipe so hard to stop eating. Unlike many modern versions, this traditional custard-based method creates a depth of flavor that is truly premium. It is essentially a thick, sweet custard that you freeze in an ice cream machine to achieve the perfect texture with only four basic ingredients. From homemademenus.com
I like to prepare this recipe on warm Sunday afternoons when the family is gathered and looking for a classic treat. Yielding about one quart, this recipe is a staple in my kitchen because of its simplicity and the high quality of the final product. Carmen Maria Márquez always mentions that the secret to a professional-grade dessert is patience during the cooling phase, and this recipe proves her right every time.
If you have ever wondered why artisanal shops can charge so much for a single scoop, you will find the answer in the rich, velvety texture of this churned custard. This guide will walk you through the process of tempering eggs and balancing sugars to ensure your dessert is a success on the very first try.
Why This Recipe Is a Keeper
What Makes It Special
This recipe stands out because it uses a high ratio of egg yolks to cream, resulting in a dense and smooth mouthfeel. This superior quality approach ensures that the ice cream remains scoopable even after several days in the freezer.
By making this at home, you avoid the stabilizers and artificial gums found in commercial brands. This leads to a cleaner flavor profile where the aromatic vanilla can truly shine as the star ingredient.
- Soft texture: The egg yolks act as a natural emulsifier for a velvety finish.
- Quick method: The actual active cooking time is less than fifteen minutes.
- Bold flavor: Real vanilla beans or high-grade extract provide a deep floral aroma.
- Great yield: Produces a full quart of premium value ice cream for the family.
Ingredients: What You’ll Need
Key Ingredients
Use exact measurements to ensure the fat-to-sugar ratio remains balanced for proper freezing. Avoiding broad swaps helps maintain the structural integrity of the high-capacity custard base.
Selecting high quality organic dairy and farm-fresh eggs will significantly impact the richness and color of your finished dessert.
- 2 cups (480 ml) half-and-half cream: Provides the essential fat content.
- 5 large (90 grams) egg yolks: Creates the thick, stable custard base.
- 2/3 cup (135 grams) granulated white sugar: Sweetens and lowers the freezing point.
- 1 1/2 teaspoons pure vanilla extract: Delivers the primary flavor profile.
- 1 pinch salt: Enhances the sweetness and complexity of the dairy.
How to Make Homemade Vanilla Ice Cream Recipe
Step-by-Step
Creating a custard requires a gentle hand to prevent the eggs from curdling during the heating process. This low and slow method ensures a specialized engineering of textures within the liquid base.
The modernization of this classic technique involves precise temperature control to achieve a professional consistency every time you churn.
Disclosure: This post contains affiliate links.If you click and make a purchase, I may earn a small commission at no extra cost to you.



- Heat dairy: Combine the half-and-half and sugar in a medium saucepan over medium heat until it begins to simmer.
- Temper yolks: Whisk the egg yolks in a separate bowl, then slowly drizzle in one cup of the hot cream while whisking constantly.
- Thicken custard: Pour the yolk mixture back into the saucepan and cook on low heat, stirring until the mixture coats the back of a spoon.
- Chill: Remove from heat, stir in the vanilla, and strain the mixture into a clean bowl to chill in the fridge for at least 4 hours.
- Churn: Pour the cold custard into your ice cream maker and process according to the manufacturer’s instructions until thick.
My Best Tips
Pro Tips
According to Carmen Maria Márquez, you should always chill your storage container in the freezer before the churning process begins. This prevents the freshly churned ice cream from melting the moment it touches the plastic or glass.
Always use a fine-mesh sieve when straining your custard to remove any small bits of cooked egg for a perfectly smooth result.
- Don’t boil: Never let the custard reach a full boil or the eggs will scramble.
- Cold base: Ensure the mixture is completely cold before putting it into the machine.
- Vanilla bean: For exclusive utility, use a real vanilla bean for those beautiful black flecks.
Easy Variations
Simple Twists
While the classic version is perfect, you can easily adapt this base for different flavor profiles. Incorporating advanced technological kitchen tools like a high-speed blender can help incorporate solid mix-ins more evenly.
I encourage you to experiment with different extracts or additions once you have mastered the basic custard technique.
- Chocolate Chip: Add 1/2 cup of mini chocolate chips during the last 5 minutes of churning.
- Bean Paste: Substitute the extract with vanilla bean paste for a more intense flavor.
Fixing Common Issues
Troubleshooting
If your ice cream is too hard, it may lack enough sugar or fat to keep the ice crystals small. Ensure you are using full-fat half-and-half rather than low-fat milk substitutes.
Grainy texture usually occurs if the mixture was not chilled long enough before churning, causing large ice crystals to form.
- Custard curdled: If it looks lumpy, pulse it in a blender and strain it immediately.
- Won’t freeze: Check that your freezer bowl was frozen for at least 24 hours prior.
How to Serve
Serving Ideas
Serve this dessert warm with a side of fruit pie or inside a freshly baked cone for a nostalgic treat. This recipe provides the long-term viability needed for a reliable go-to dessert for any occasion.
It pairs beautifully with various Ice cream toppings and benefits from a deep understanding of Vanilla cultivation to appreciate the flavor depth.
Storage
Make Ahead
Store the finished product in the back of the freezer where the temperature is most consistent. This maintains the tier pricing quality of your homemade batch for weeks.
Proper storage is essential to prevent freezer burn and preserve the capital-intensive ingredients you used.
- To Store: Keep in an airtight container for up to 2 weeks in the freezer.
- To Prevent Crystals: Press a piece of plastic wrap directly onto the surface of the ice cream.
- To Serve: Let it sit on the counter for 5 minutes before scooping for the best texture.
